How to setup a MS SQL server for non-DBA systems administrators
It’s a fact that most MS SQL servers running in organizations are not built by DBAs. Small, medium and even larger organizations don’t hire professional DBAs. Even in environments where there are DBAs, it will happen quite often that databases servers were built by sysadmins for various reasons.
Microsoft did a great job as it’s easy to setup a SQL server, probably too easy and it will run “fine” without too much effort… for how long?
I’m writing this article for all my sysadmins friends who are building MS SQL servers to the best of their knowledge.
Before you start:
Choose SQL version (2012, 2014, 2016, 2017, 20XX?)
For me, latest is always the best!
However, you need to confirm what version is supported by the product that will use that SQL server.
Standard: my default choice for production unless there are some features that are absolutely necessary in the Enterprise edition. Price difference is huge between these two editions and most of time it’s worth extra effort to be able to stay with Standard.
Good news, in the past, I had to install Enterprise to use AlwaysOn clustering. This feature is now included in 2017 Standard edition. Thank you Microsoft!
Enterprise: when it is absolutely needed. List price of Enterprise is 14 256USD$/core compared to 3 717USD$/core for the Standard edition.
Important consideration for Virtual Machines: If you will be running SQL server in a VM cluster, you need to either have Software Assurance for your product or to license each physical host for SQL… The cheapest way to get around this is to use DRS (if running in VMWare) to lock the machine to a specific host but, you will lose capability of moving the VM to a different host (Ensuring virtual machines stay on a specific ESX/ESXi host).
Confirm required SQL Collation
Confirm with your editor or developer if there are some requirements for the collation of the machine you are preparing.
You will need this information in the setup.
Changing the collation of a server will require downtime.
AD Service accounts & Groups
Service accounts:
You will need service accounts created in your Active Directory at least for these services:
SQL Server
SQL Server Agent
If you are planning to use other features like Reporting Services, you should get specific service accounts for them too.
You should also be using different service accounts for all SQL instances & servers.
Since Windows 2012, you can also use Group Managed Service Accounts if you prefer (Using Group Managed Service Accounts with SQL Server).
Groups:
As a general practice, I will be using distinct Active Directory groups to delegate server roles to user logins.
In this case, I will use the AD group “g_delegation_sql01_sysadmin” to provide “sysadmin” server role to my admin user account for this specific server (sql01).
Here is a rough version of the security model I’m using:
Distinct account for Administrative tasks: “DBENJAMIO”.
This account is a member of the “DBA” group.
Delegation group for Sysadmin server role: “g_delegation_sql01_sysadmin”.
“DBA” group is a member of “g_delegation_sql01_sysadmin” group.
Server considerations
When you build, or ask, for your server, take into consideration following elements:
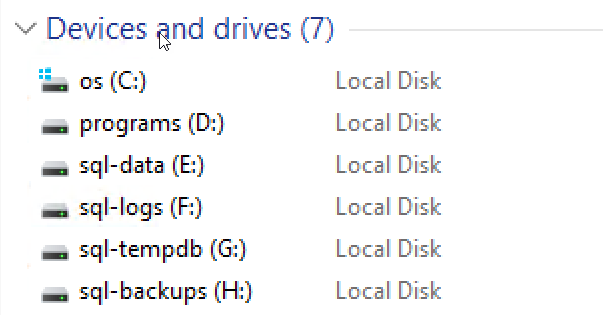
Drives configuration
I separate OS, programs, sql data files, sql log files, sql tempdb and sql backups on different drives.
Hard drives configuration
N.B. For obvious reasons, on production SQL servers, backups should be sent to a different server.
The size of your drives will vary based on your databases size.
For TempDB, I start with a 70 GB drive at least.
Make sure your drives are formatted with the following blocksizes:
OS: 4 Kb
Programs: 4 Kb
SQL Data: 64 Kb
SQL Logs: 64 Kb
SQL Backups: 4 Kb
You can verify blocksize configuration by running following command:
$wmiQuery="SELECT Name, Label, Blocksize FROM Win32_Volume WHERE FileSystem='NTFS'"Get-WmiObject-Query$wmiQuery-ComputerName'.'|Sort-ObjectName|Select-ObjectName,Label,Blocksize
Powershell, blocksize result
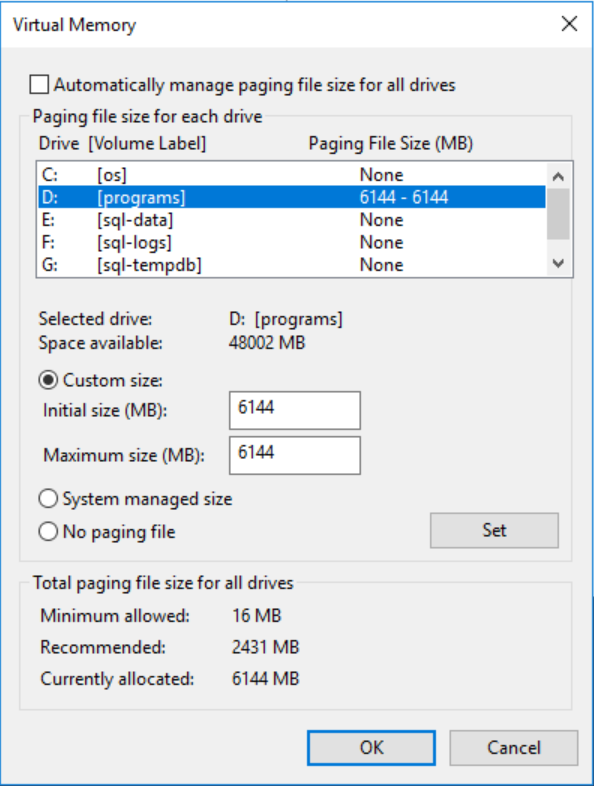
Adjust page file
For SQL Server hosts, you don’t need to have a huge (1.5x server memory) page file as we will limit memory usage of MS SQL later. You only need to consider the OS and, if any (but there should not be), other applications running on the server. Use this calculation to determine page file configuration for SQL Server: reserved memory for OS * 1.5. In most cases, it will be 1.5 * 4 * 1024=6144 for the page file.
As a habit, I’m also moving the page file to the “programs” drive:
pagefile
Antivirus
If antivirus is required on your SQL server, make sure all recommendations are applied to exclude files and processes used by SQL Server: How to choose antivirus software to run on computers that are running SQL Server.
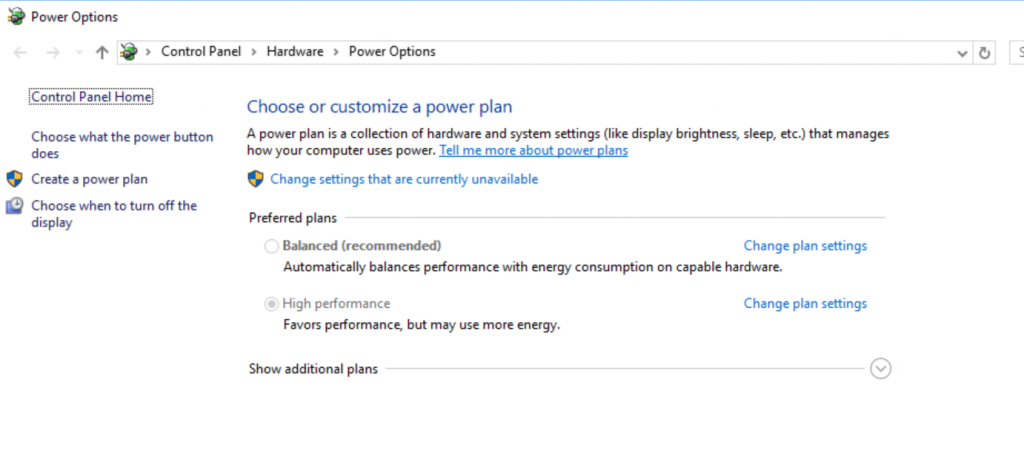
Power mode
In Windows, make sure power plan is set to “High performance” instead of default “Balanced”.
power mode settings
If you have “balanced” power options on your server, you should probably ask yourself (or your windows sysadmin counterpart), if you should configure a GPO to force “High performance” plan for all servers.
If your are installing SQL Server on a physical host, you also need to review BIOS power options to make sure server is configured for maximum performance.
Let’s start the fun part!
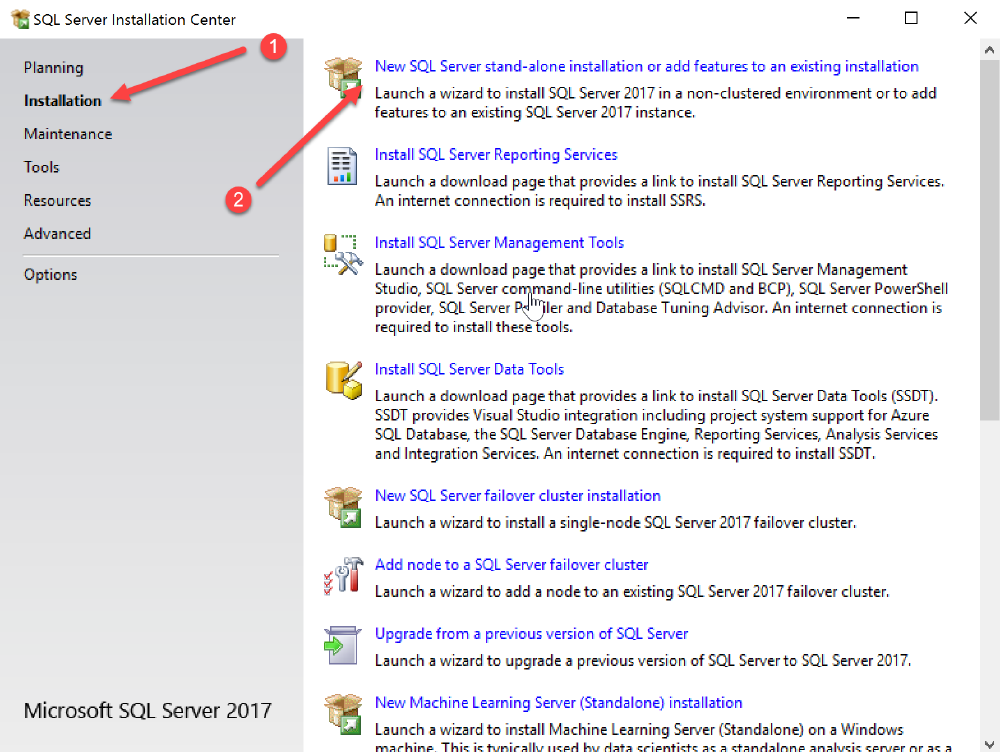
Intall prerequisites
.Net 3.5
Since SQL Server 2016, .Net 3.5 is not a requirement anymore and you can skip this step.
Mount your Windows server ISO file, let’s say to z:\ drive.
For the purpose of this procedure, I will install SQL Server 2017, Developer edition.
Launch installation:
launch installation
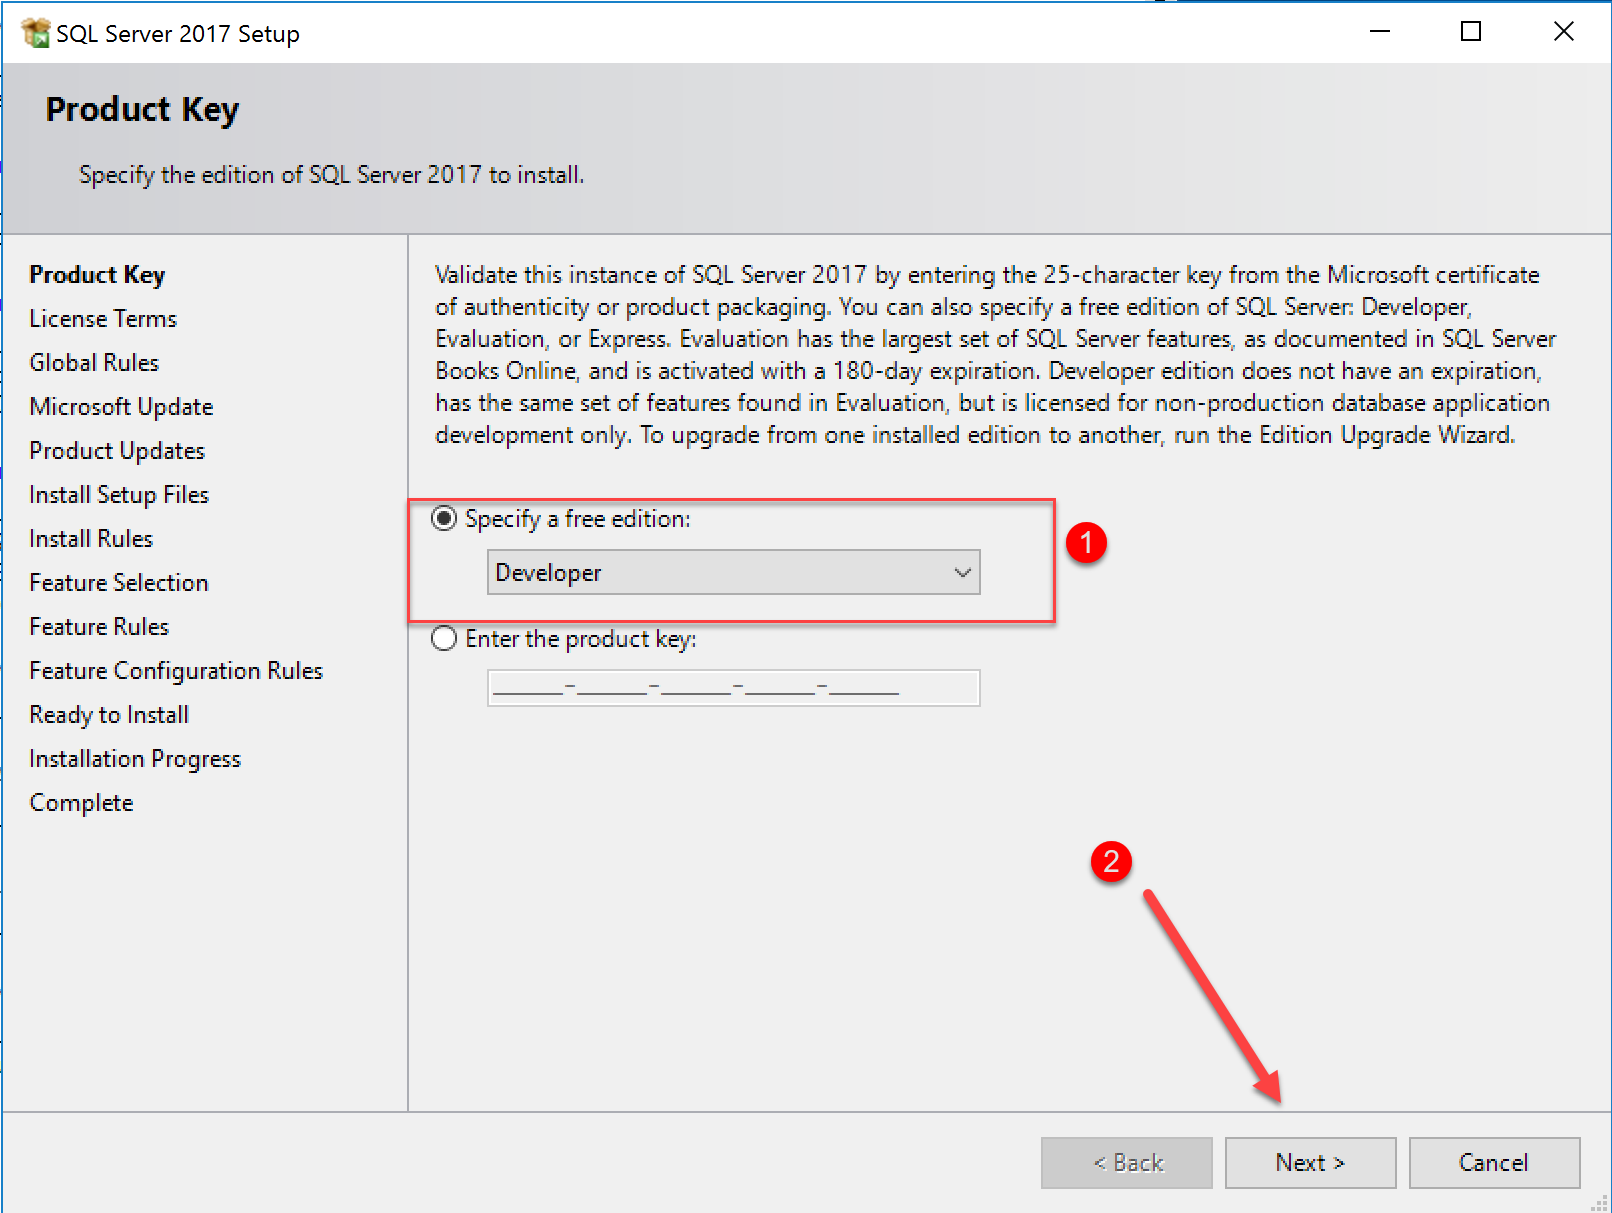
Select the Edition you want to install (for production it will be Standard or Enterprise) in the drop-down list, then click Next:
select sql edition to install
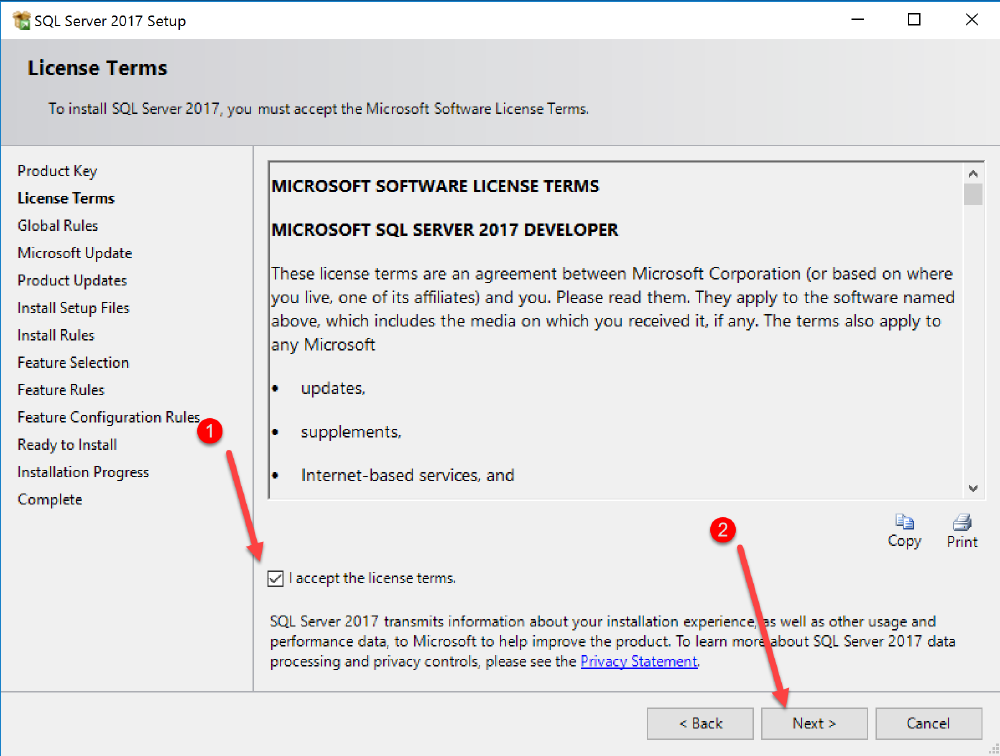
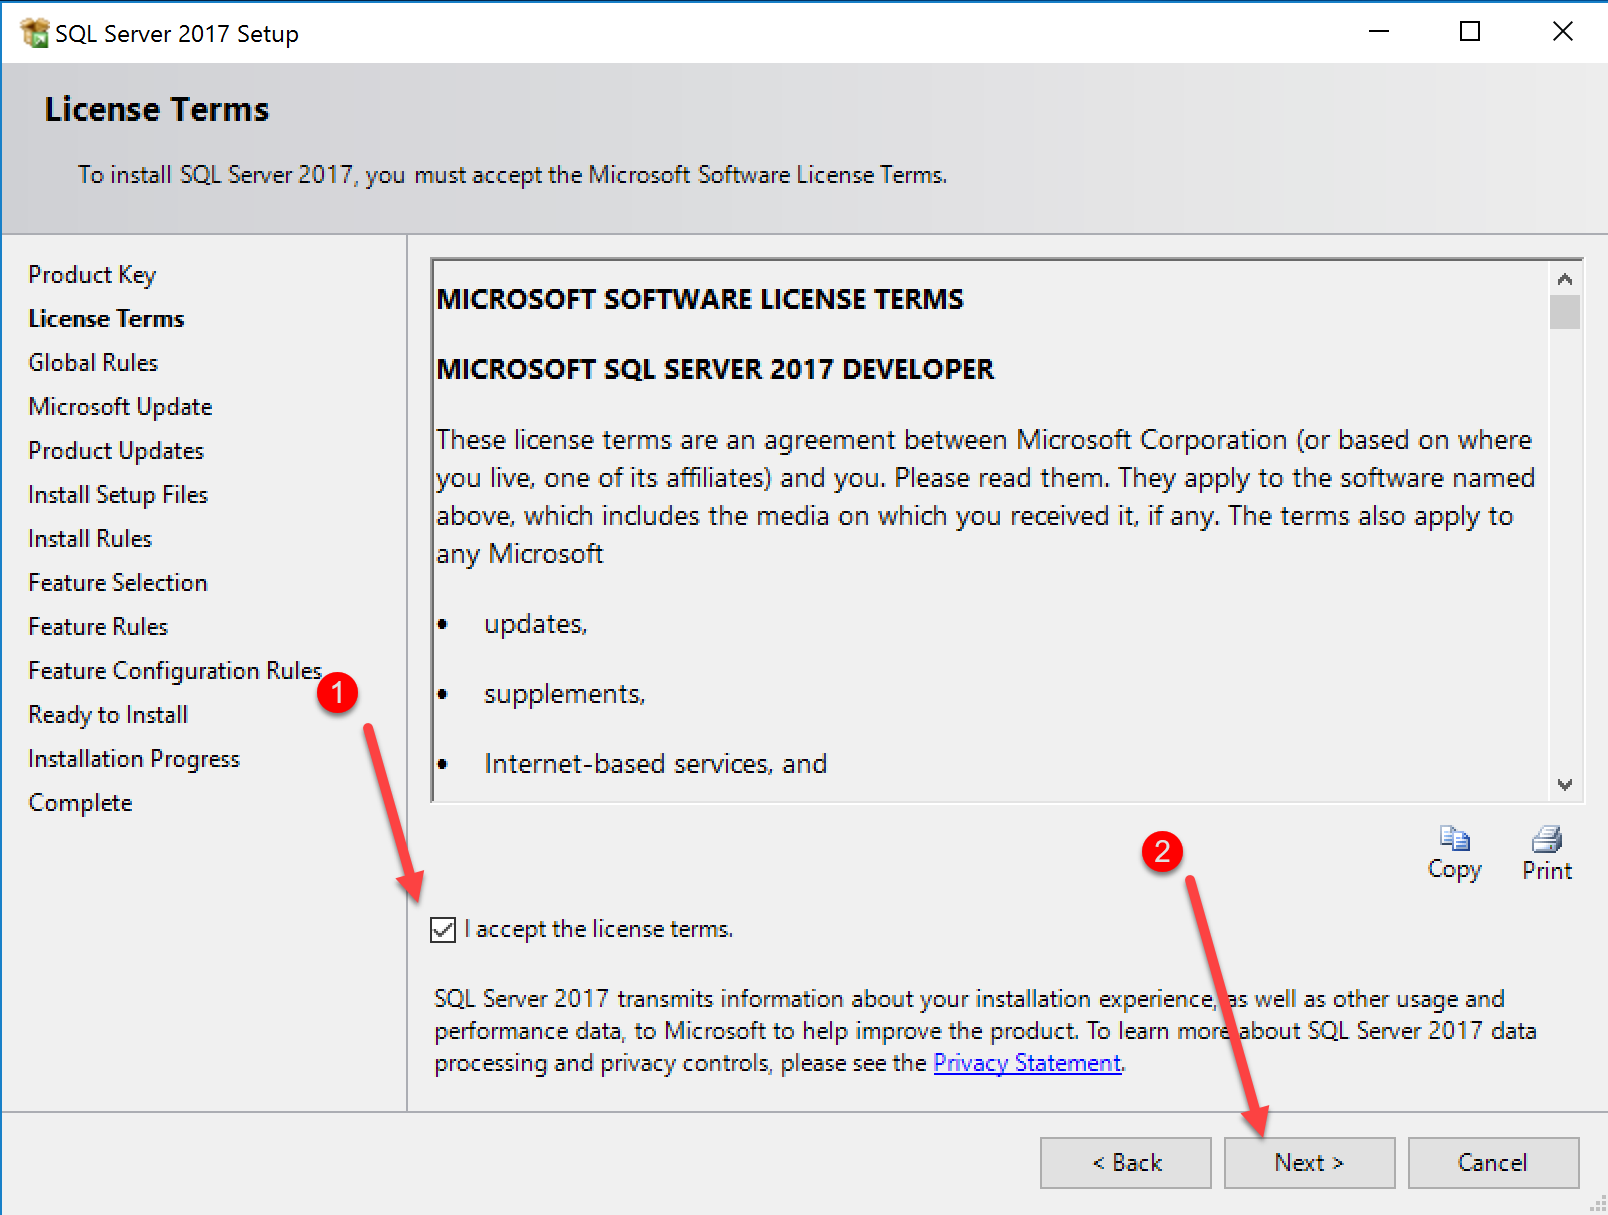
Accept license terms, then click Next:
accept license terms
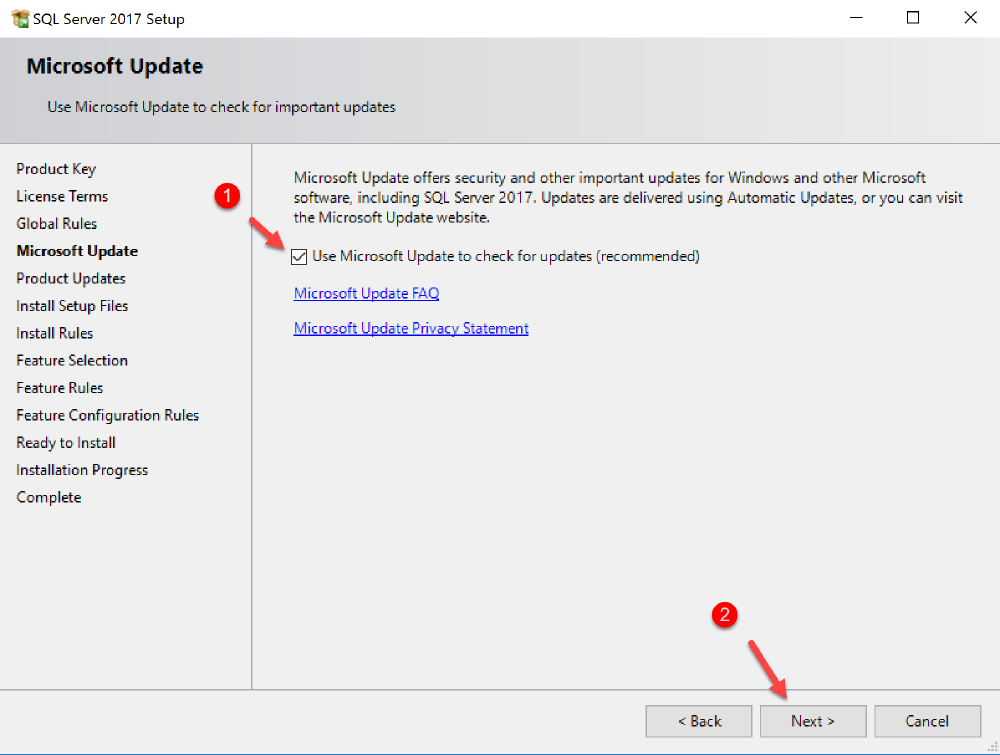
Choose how you want to receive important updates. I stick with Microsoft recommendation:
install available updates
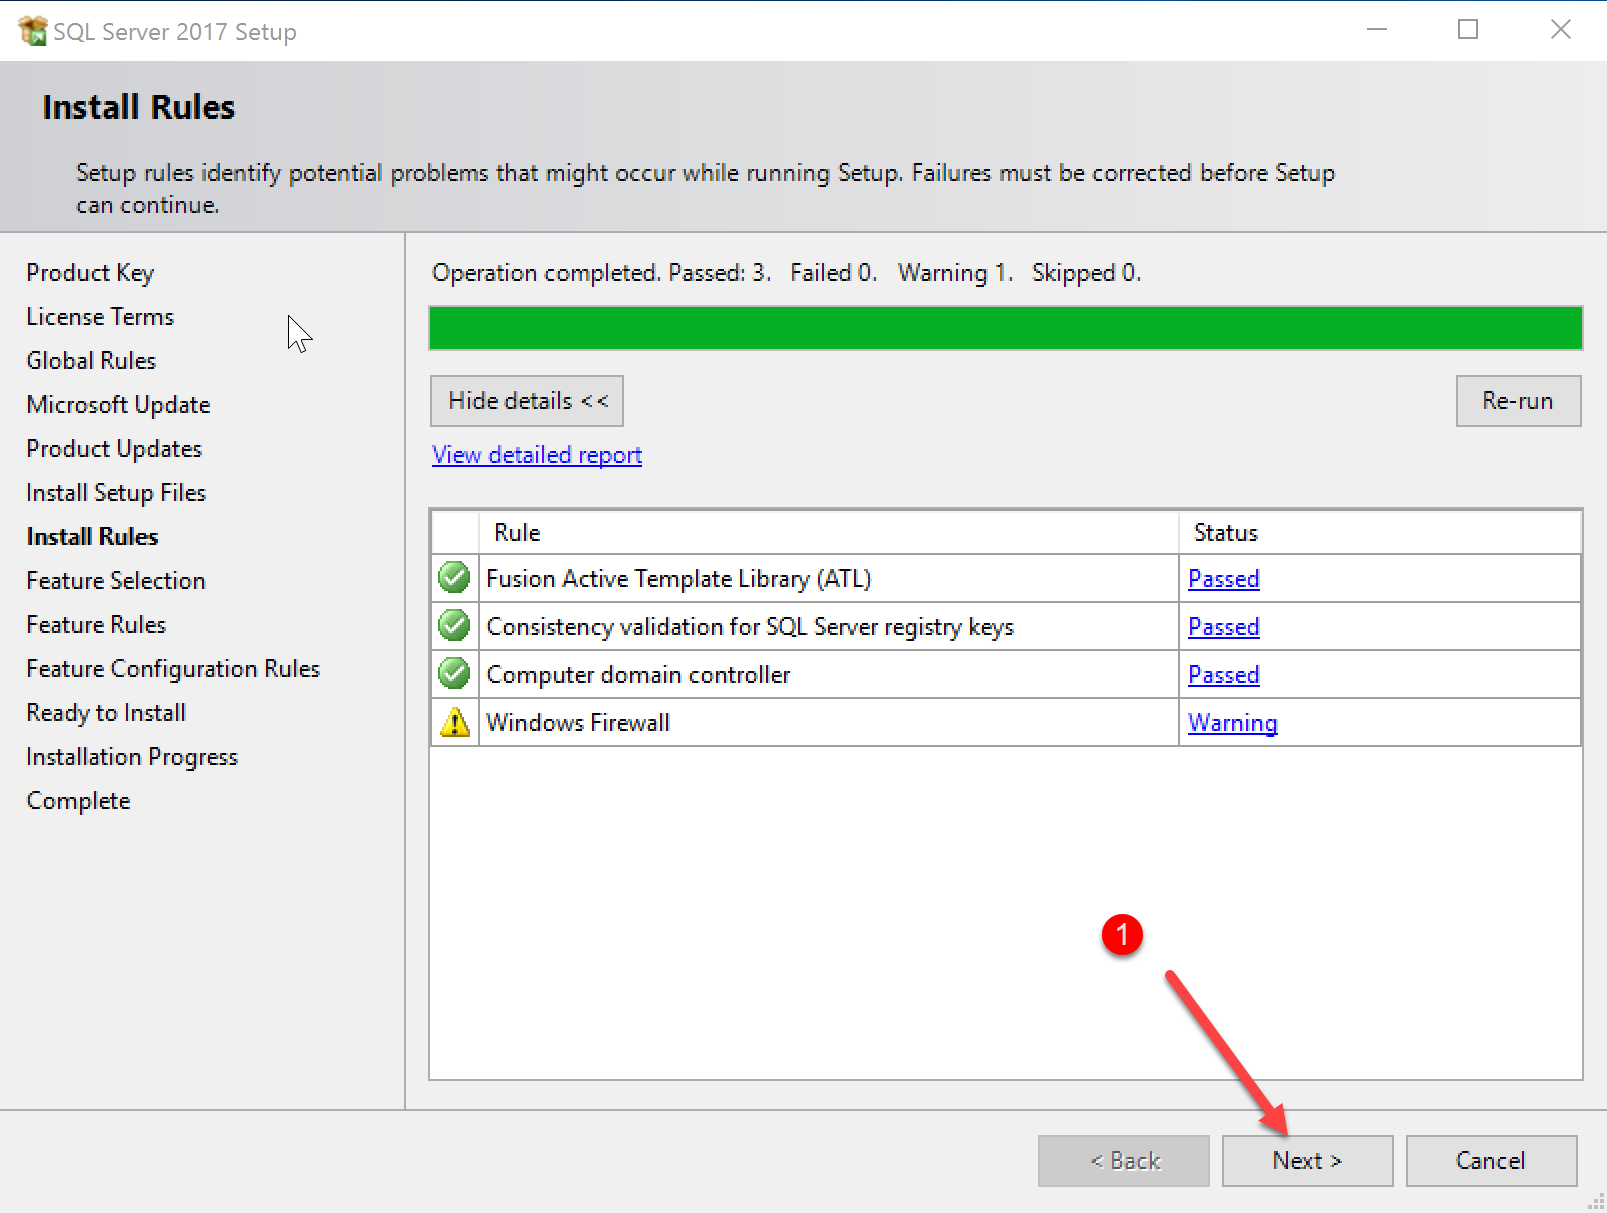
The installation will then check for any available updates and for any problem it may encounter during the installation. Press next:
install validation
N.B. I’ll address the firewall warning later in the installation.
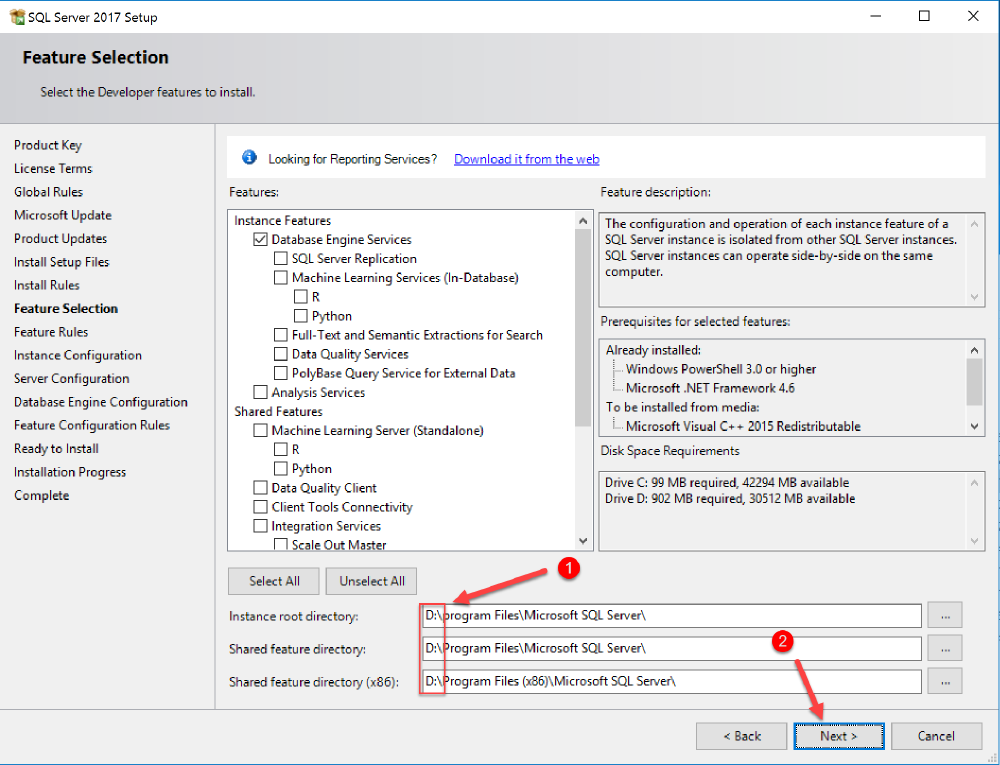
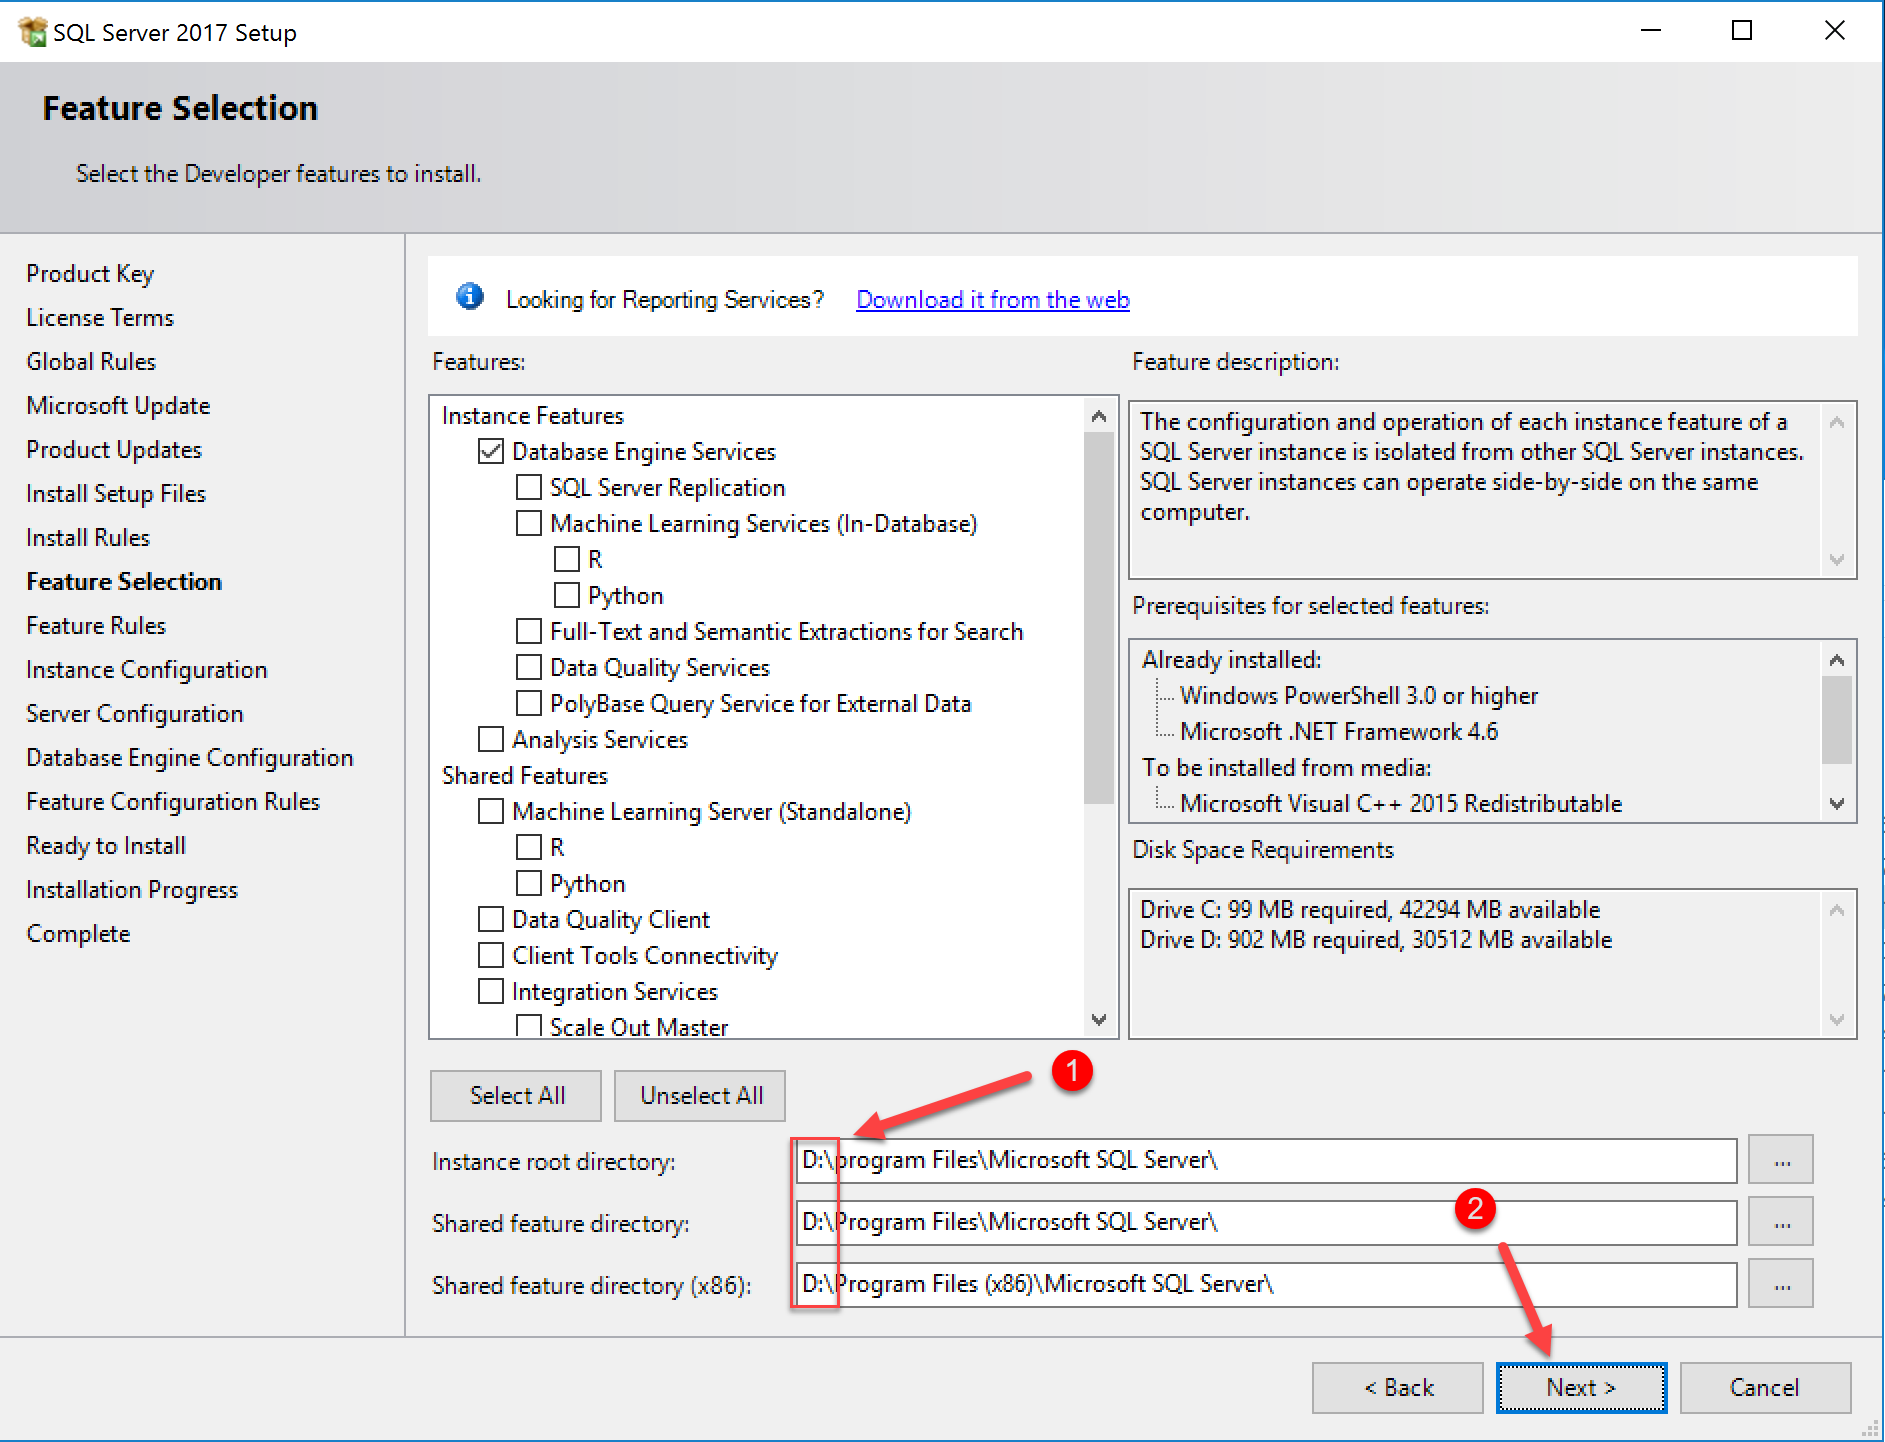
Choose the features you need to install. Don’t select features that are not required.
Change the target location from C:\ drive to D:\ drive for the 3 folders specified below.
Then press Next:
install sql features
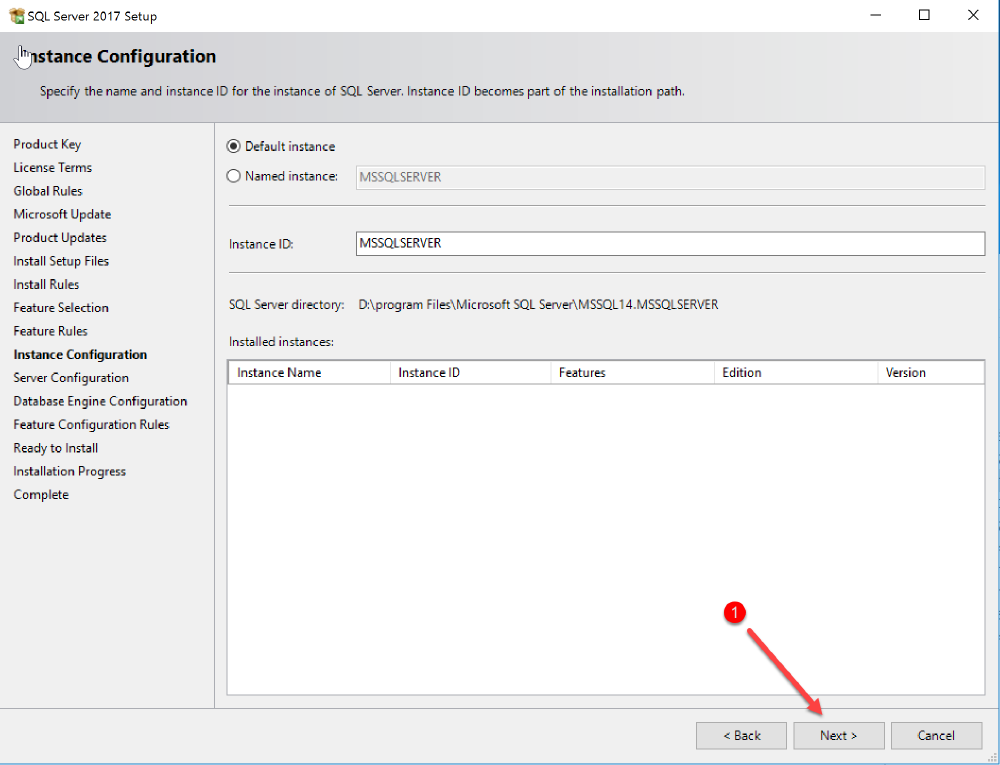
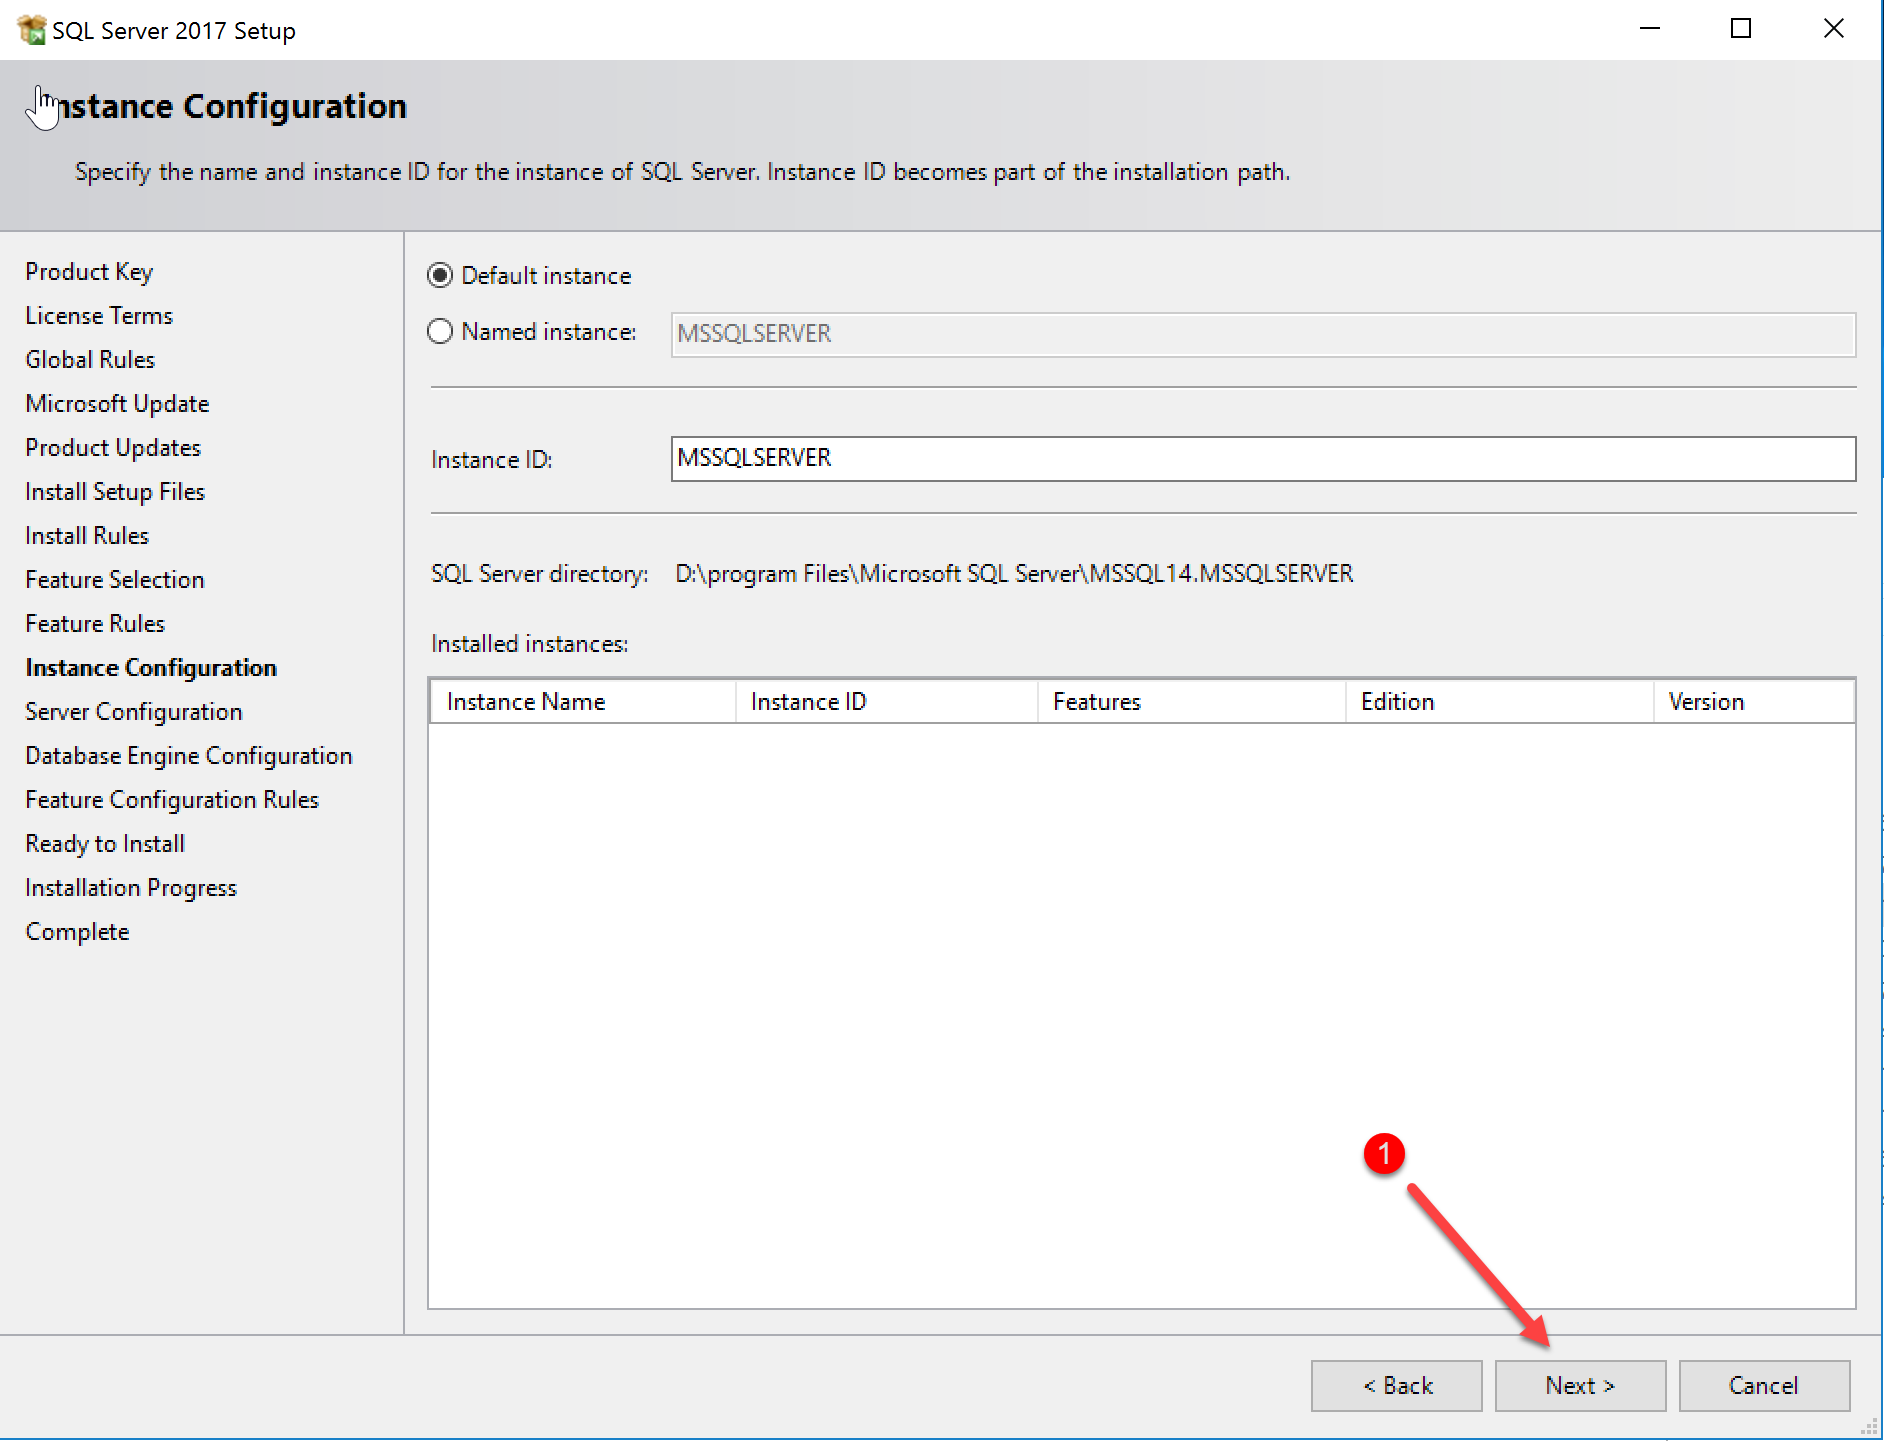
If you are planning to install multiple SQL instances on the same server, you can specify an instance name here. For the purpose of this tutorial, I’ll install a default instance:
choose name for instance to install
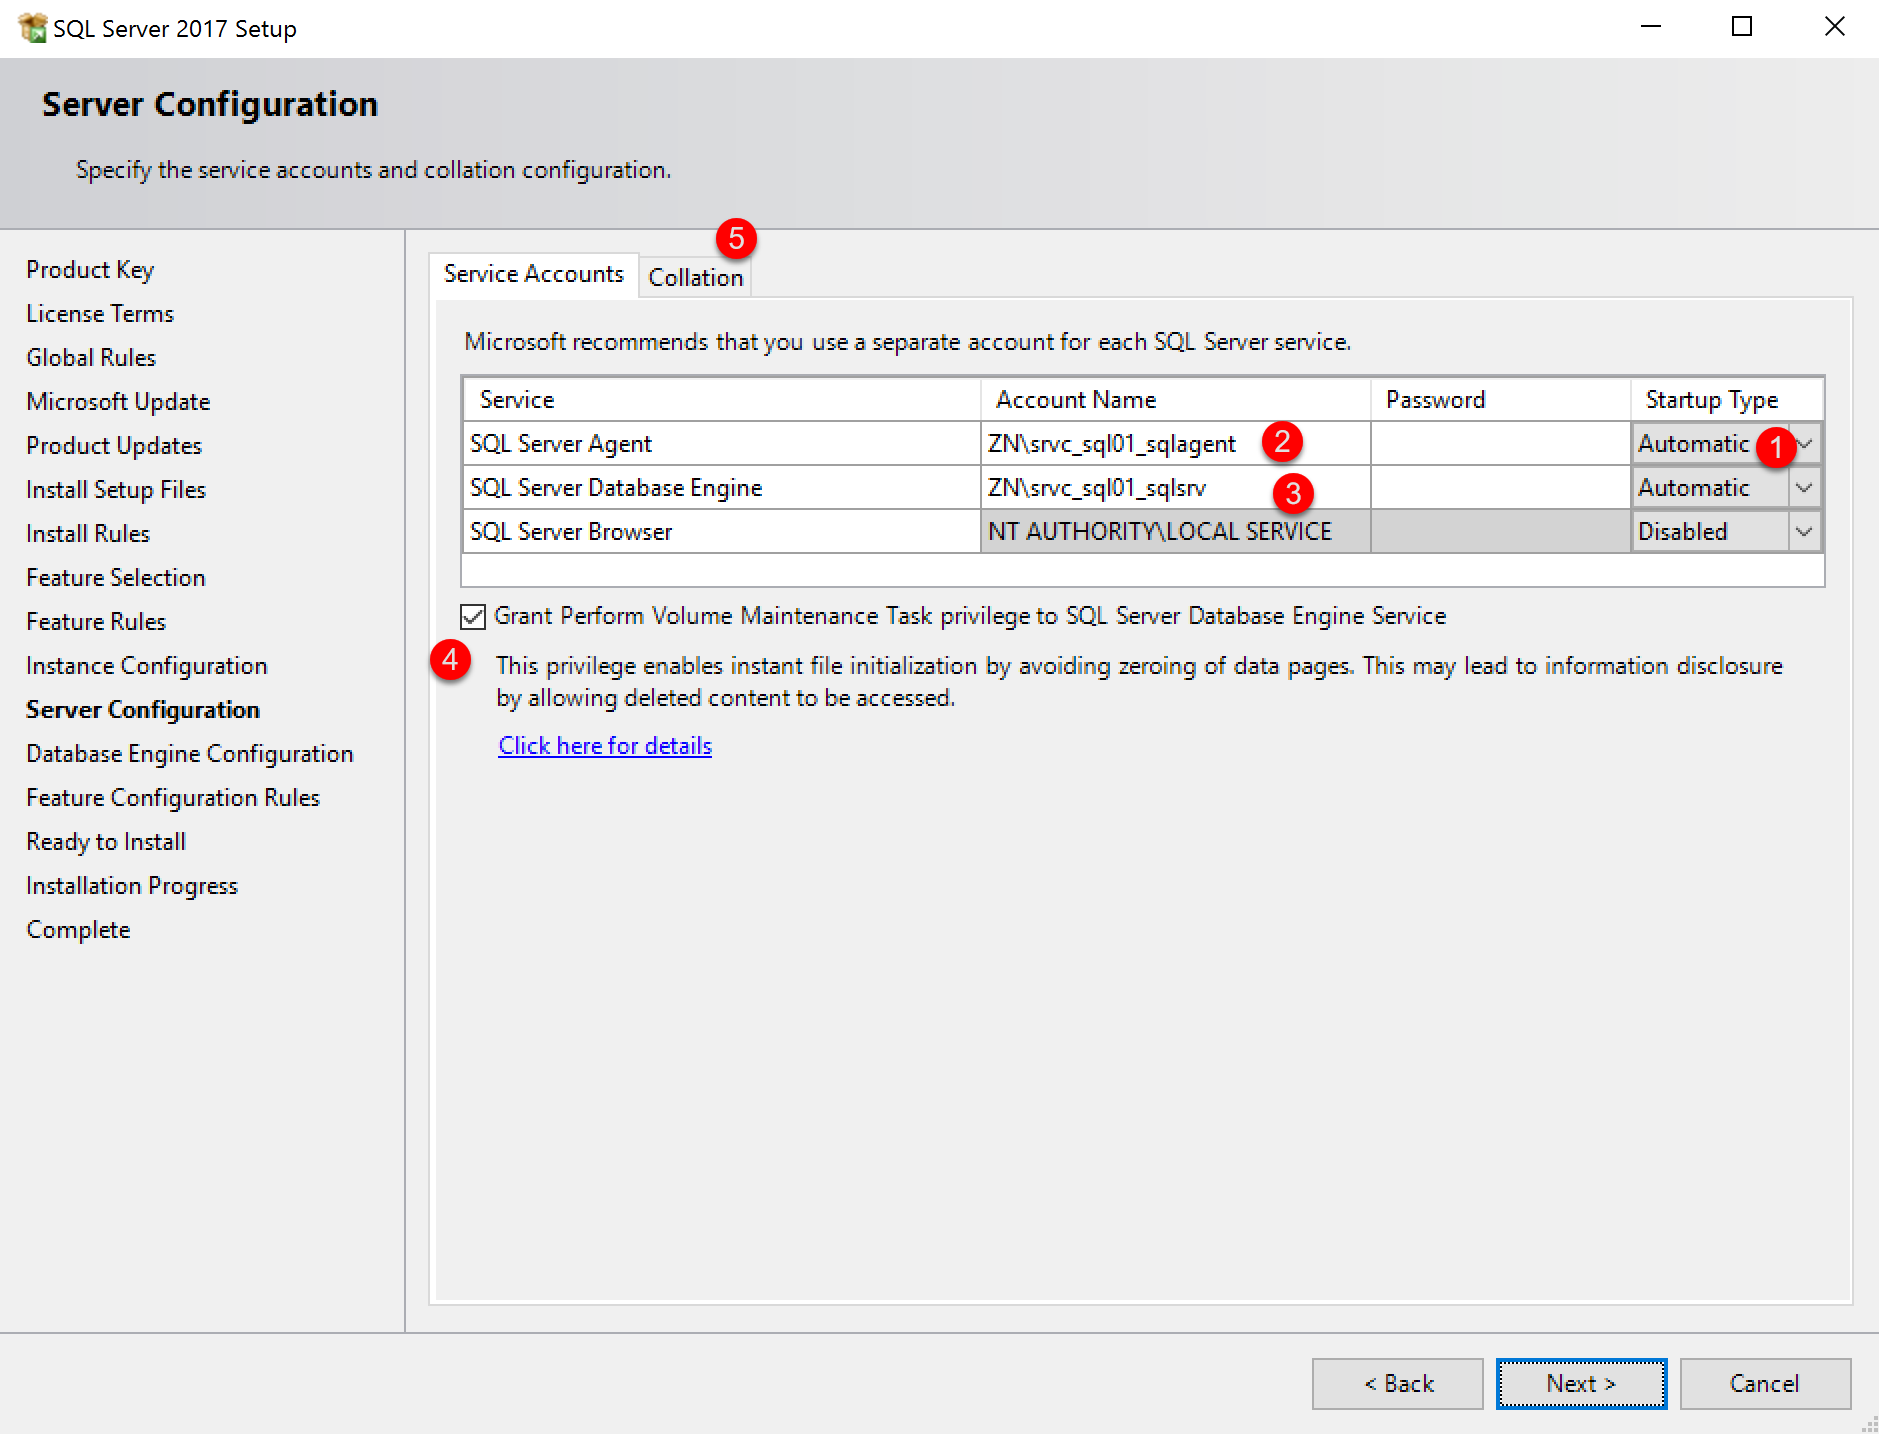
Configure service accounts:
service accounts setup
Change “Startup Type” for SQL Server Agent from Manual to Automatic.
Change “Account Name” for SQL Server Agent from “NT Service\SQLSERVERAGENT” for the domain service account account that was created for this purpose. Type the password in the “Password” field.
Change “Account Name” for SQL Server Database Engine from “NT Service\MSSQLSERVER” for the domain service account account that was created for this purpose. Type the password in the “Password” field.
Check “Grant Perform Volume Maintenance Task privilege to SQL Server Database Engine Service”.
Move to the “Collation” tab.
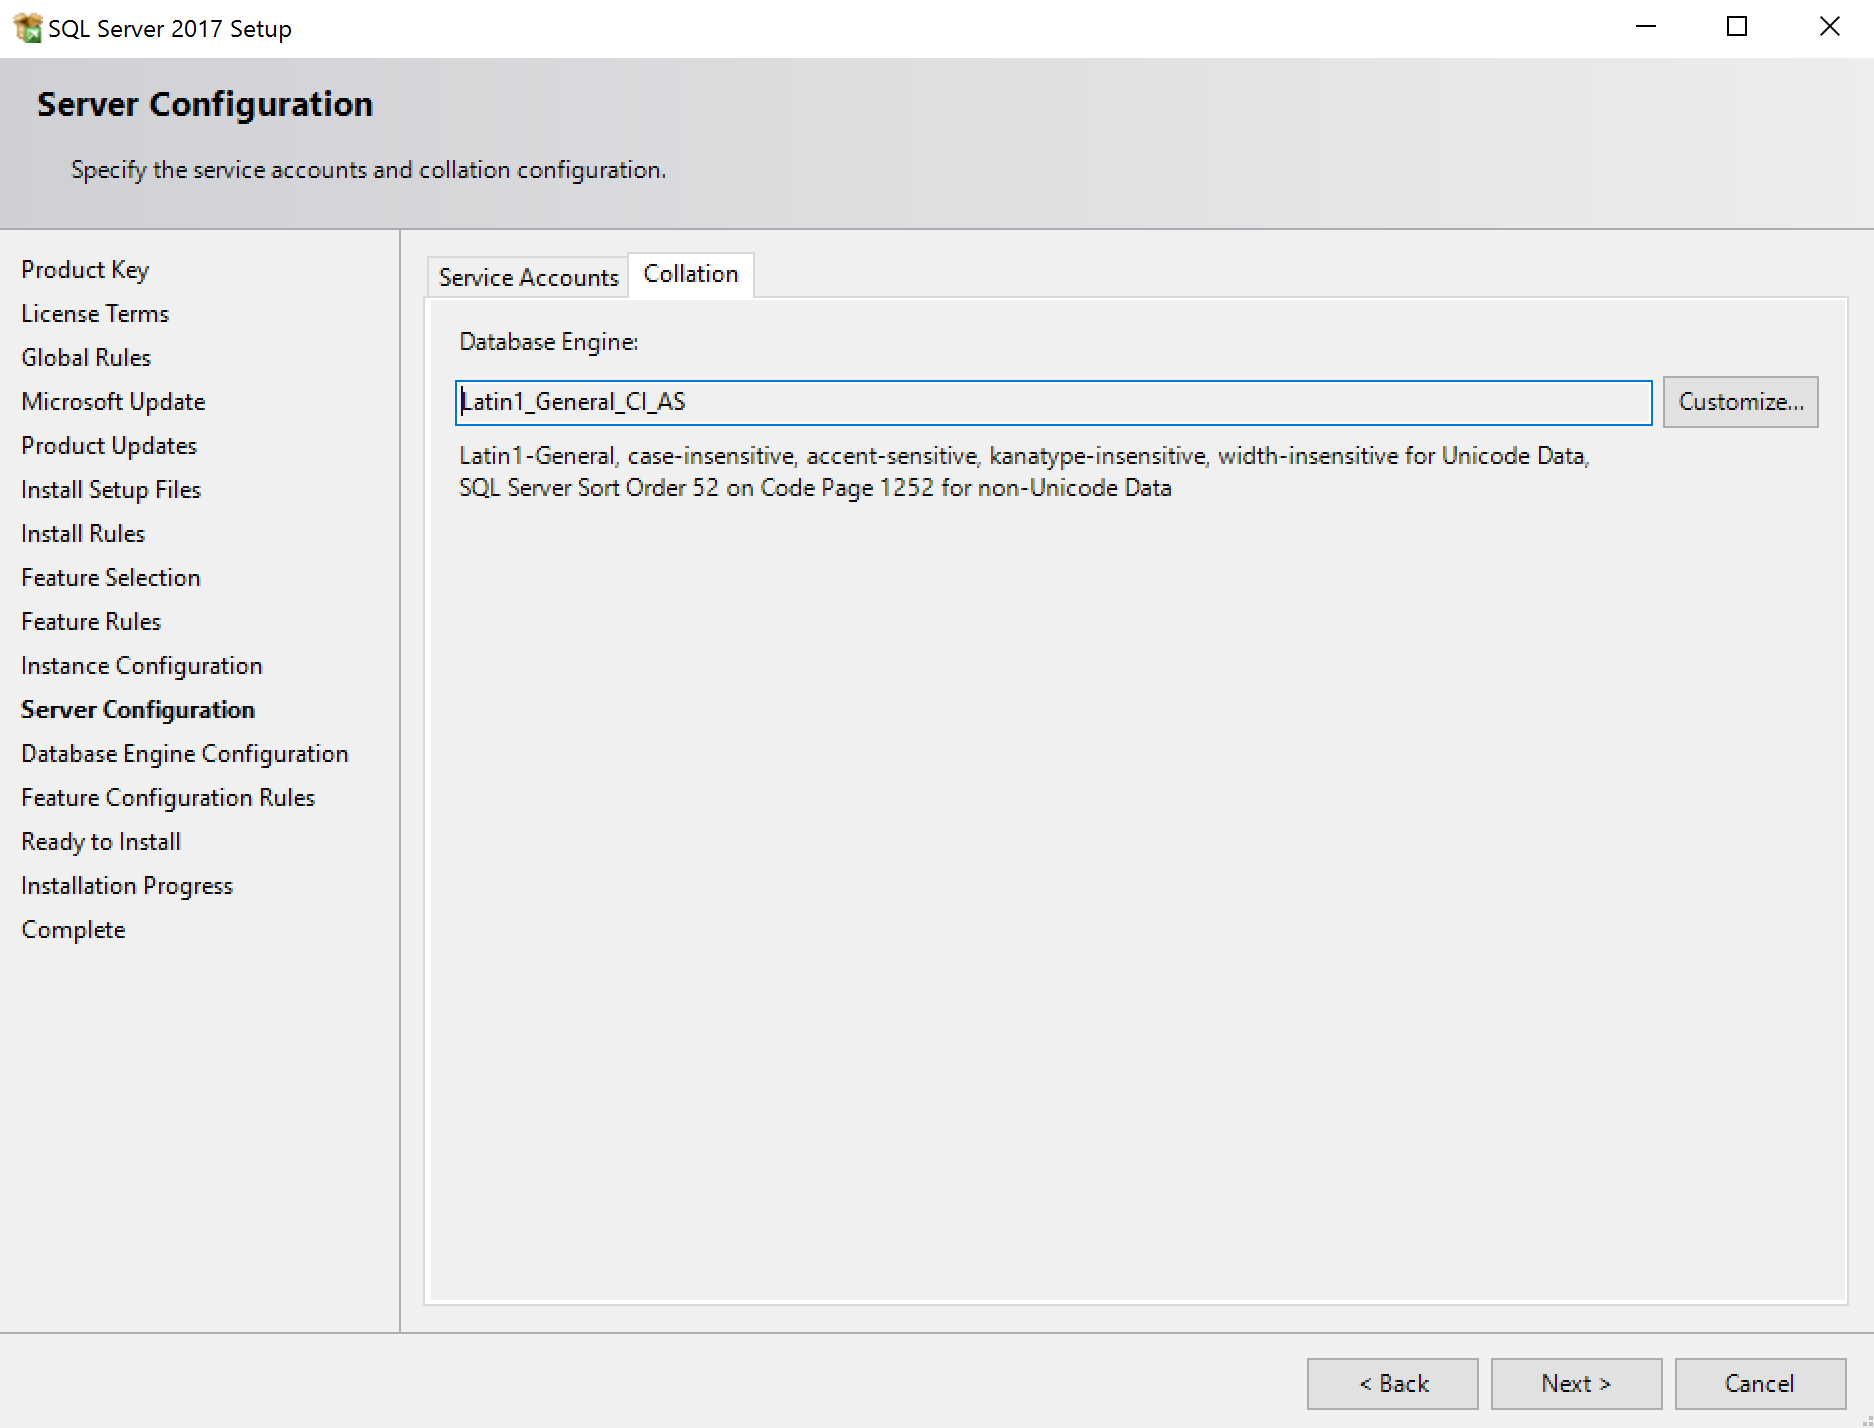
Configure Collation:
choose SQL collation
If needed, change the Collation for the one that was provided by the editor or developer of the database that will run on this server.
Database Engine Configuration:
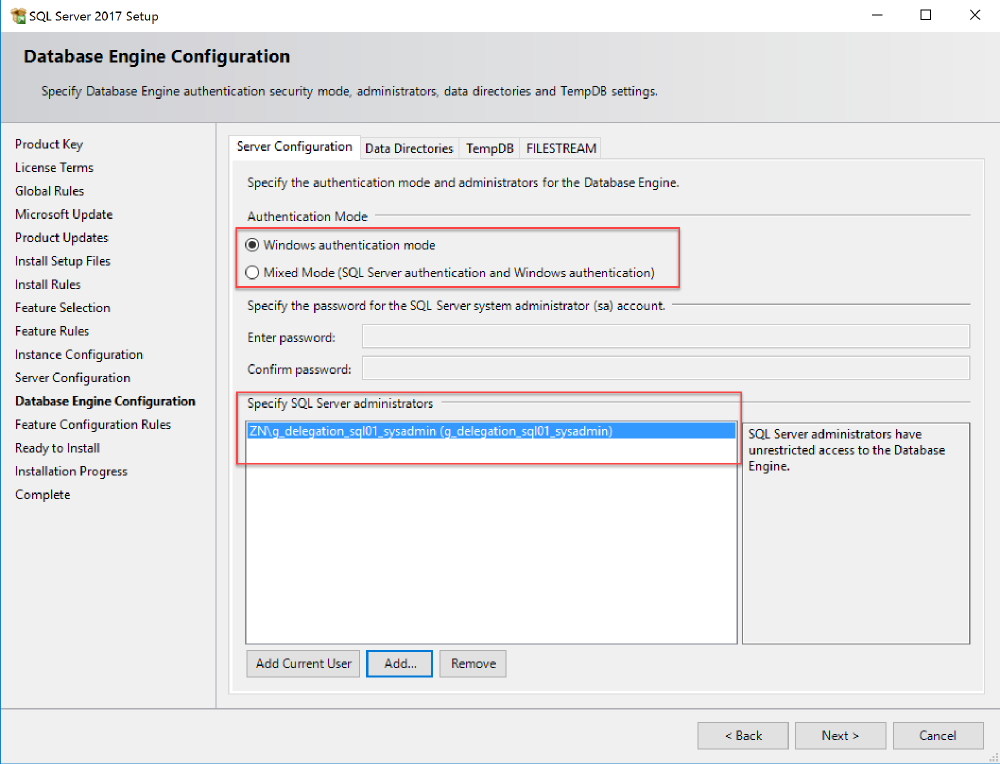
“Server Configuration” tab:
Only if you need SQL Server Authentication, change the authentication mode to “Mixed Mode”.
Specify SQL Server Administrators.
I usually create distinct delegation groups for each required SQL roles. In this case, I created “g_delegation_sql01_sysadmin”:
Server configuration tab
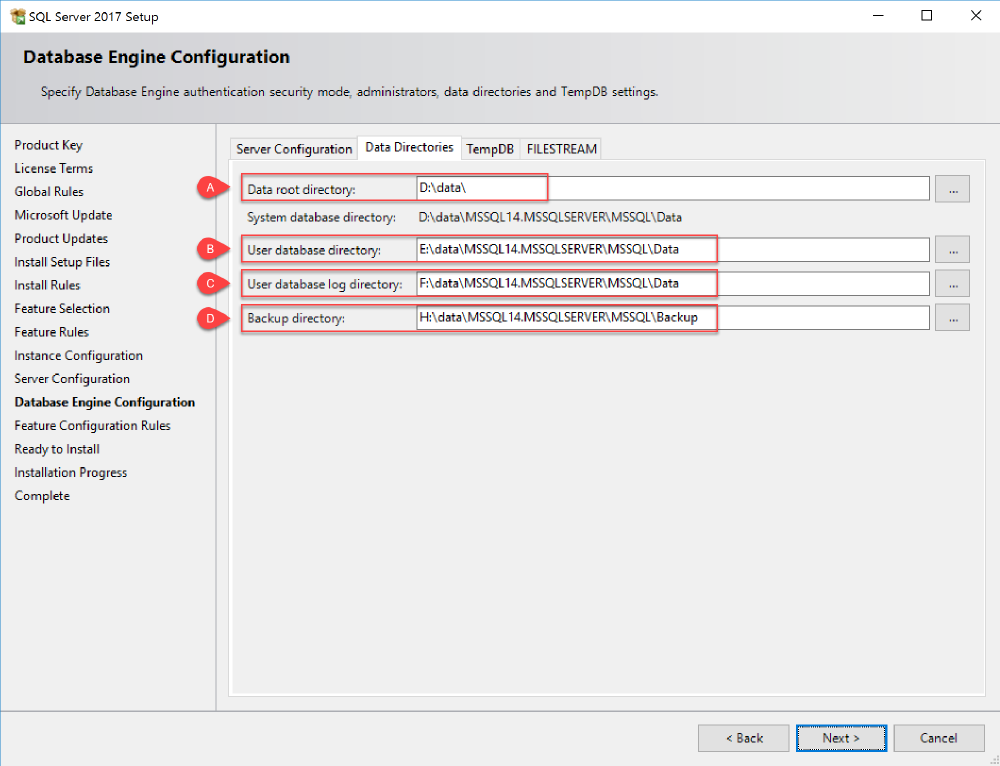
“Data Directories” tab:
Change the path of “Data root directory” to point to your programs drive.
Change the path of “User database directory” to point to your data drive.
Change the path of “User database log directory” to point to your logs drive.
Change the path of “Backup directory” to point to your backups drive.
Data Directories tab
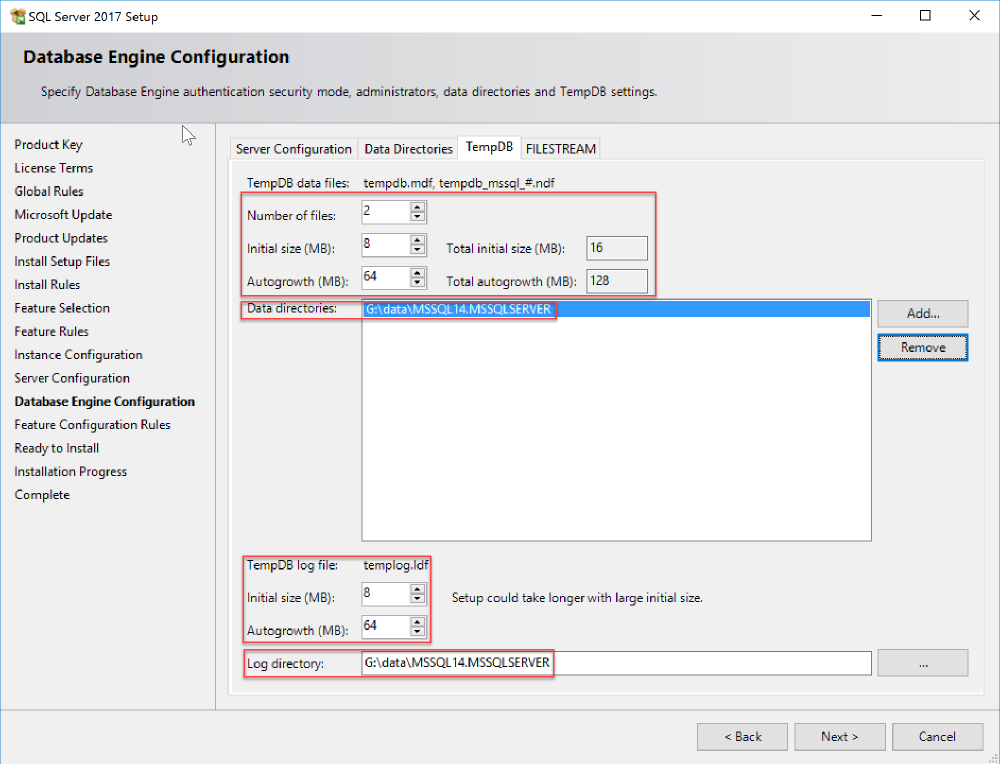
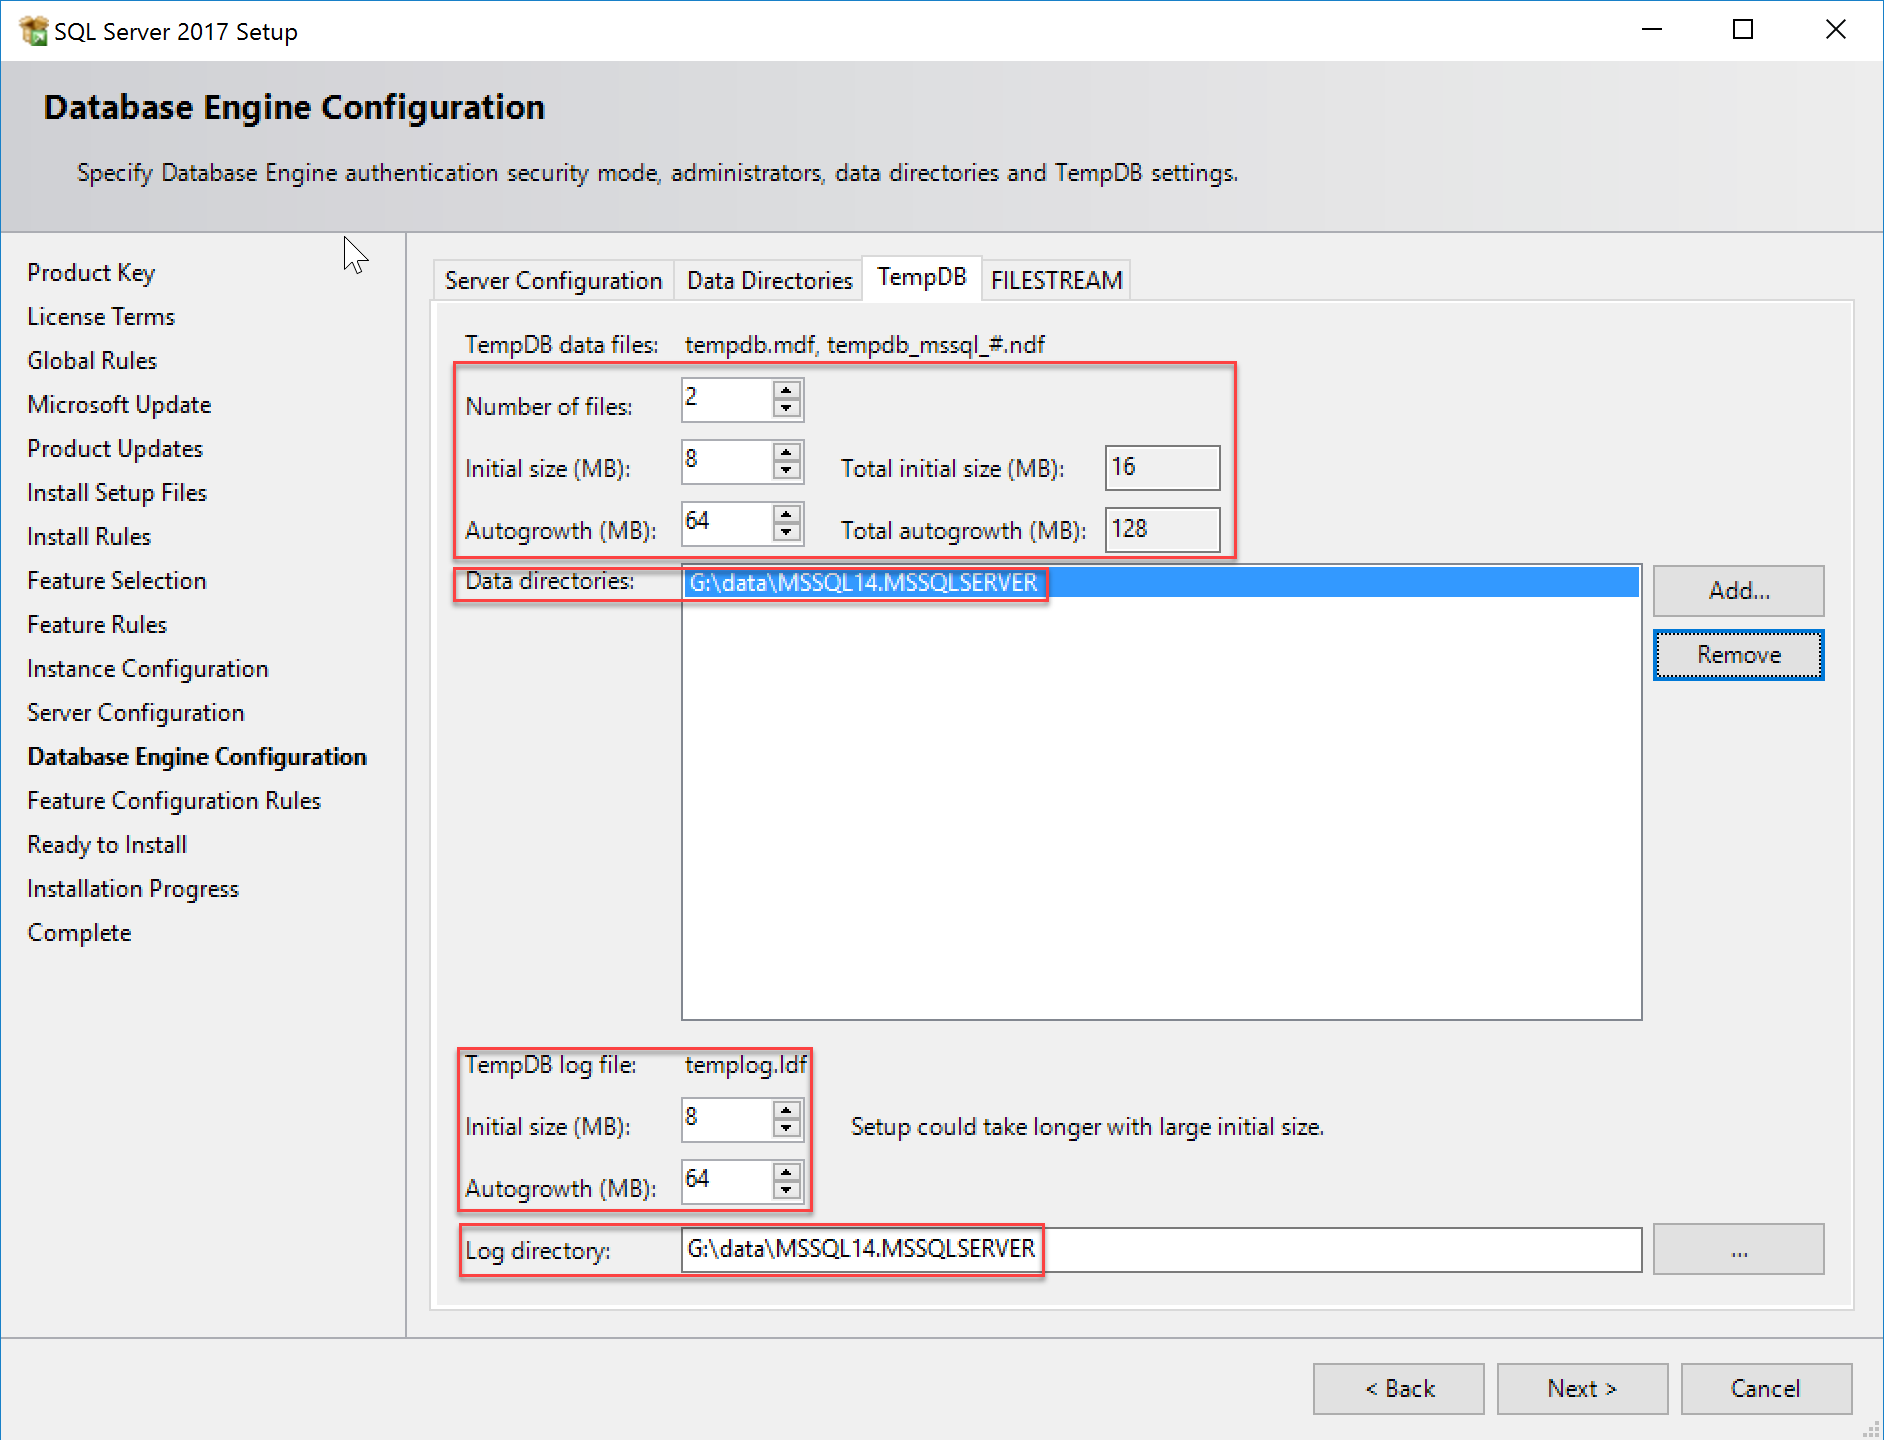
“TempDB” tab:
TempDB tab
A definitive improvement in 2017 is that you can edit TempDB files preferences during SQL Server installation. In previous versions, you will have to change these settings afterwards.
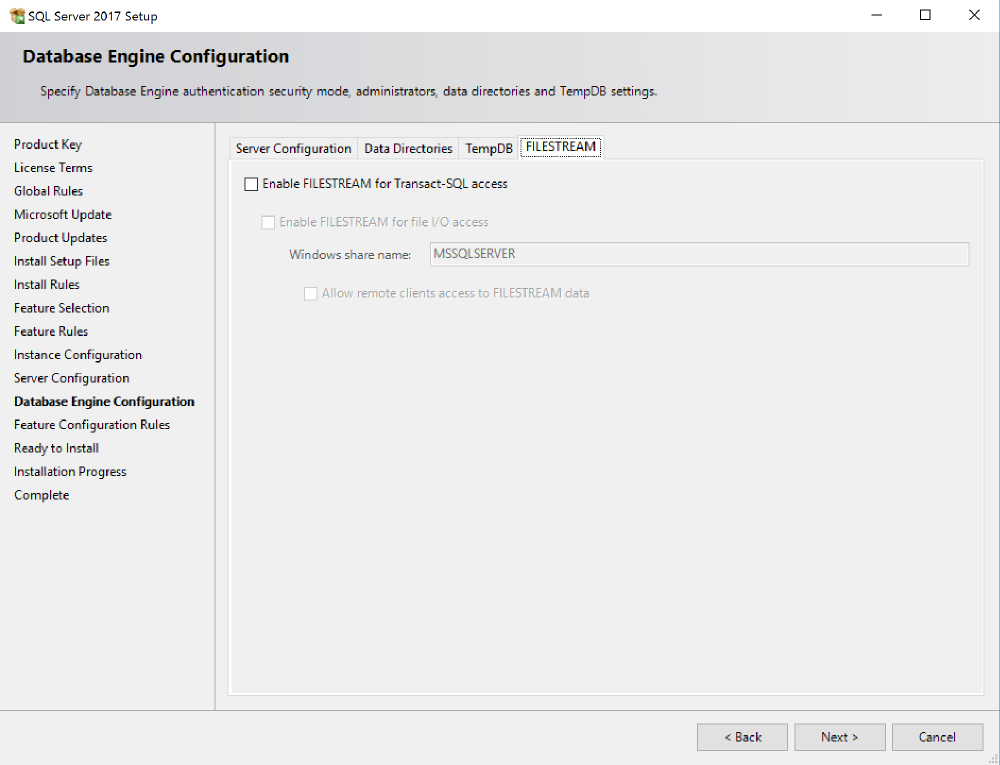
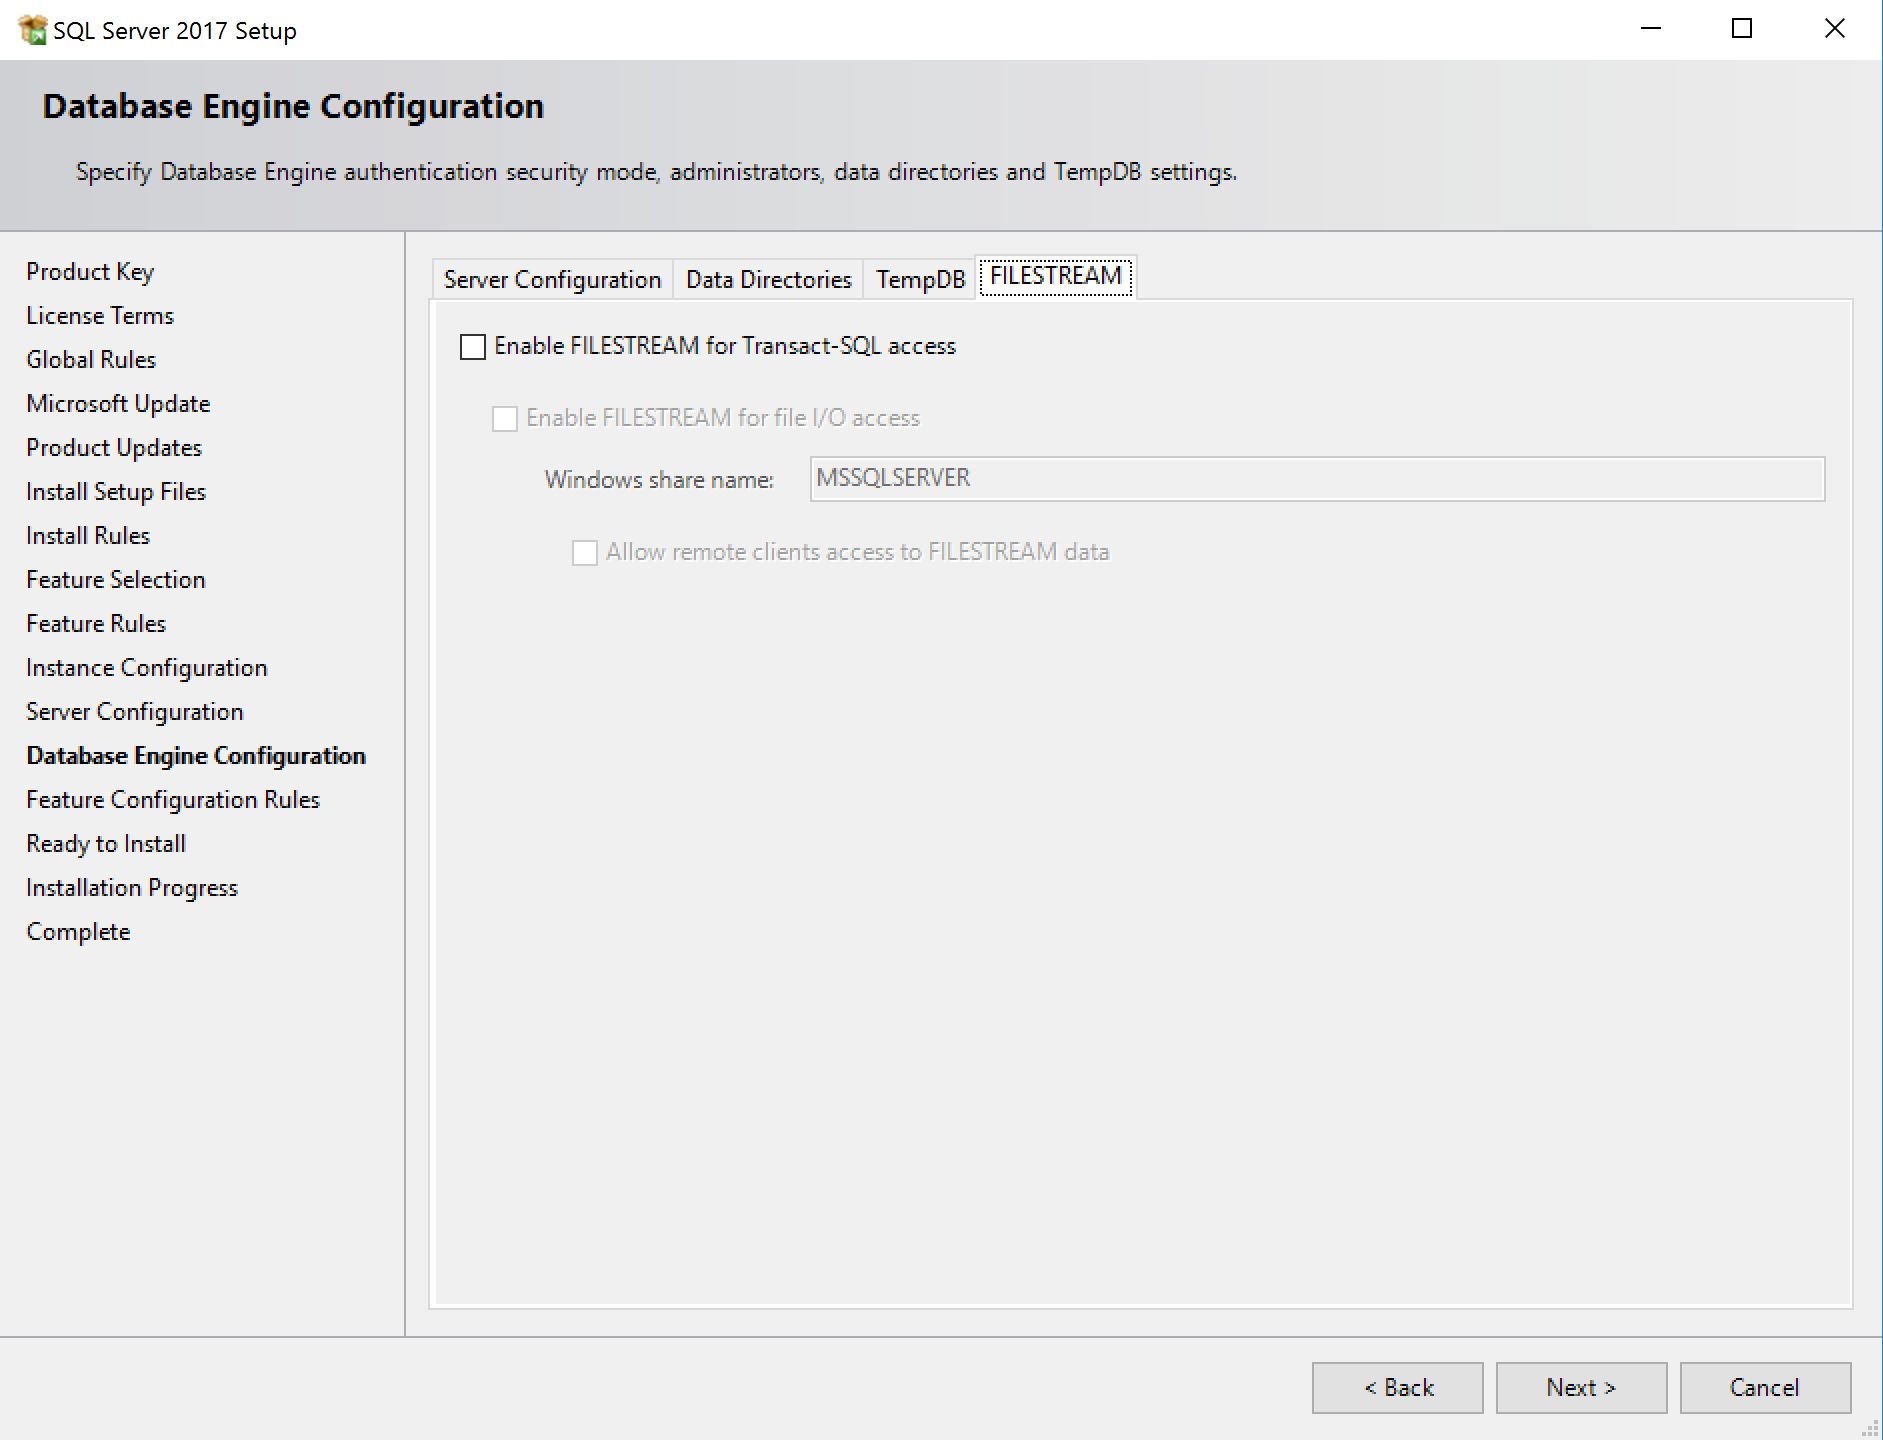
“FILESTREAM” tab:
Unless absolutely necessary, leave this disabled.
Filestream tab
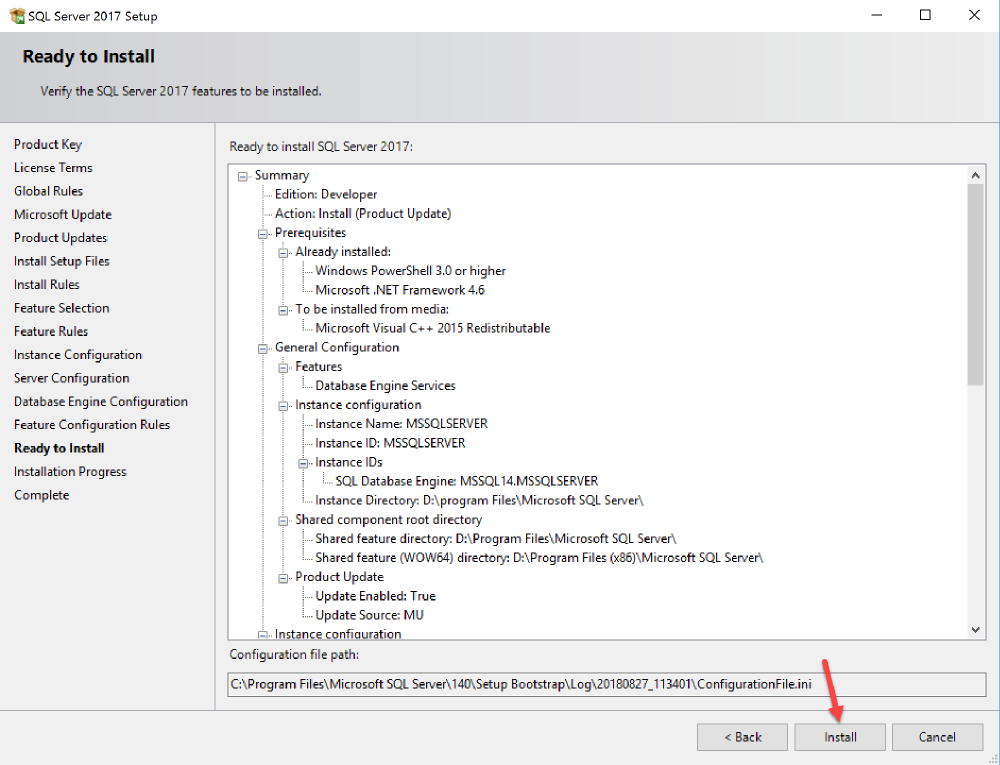
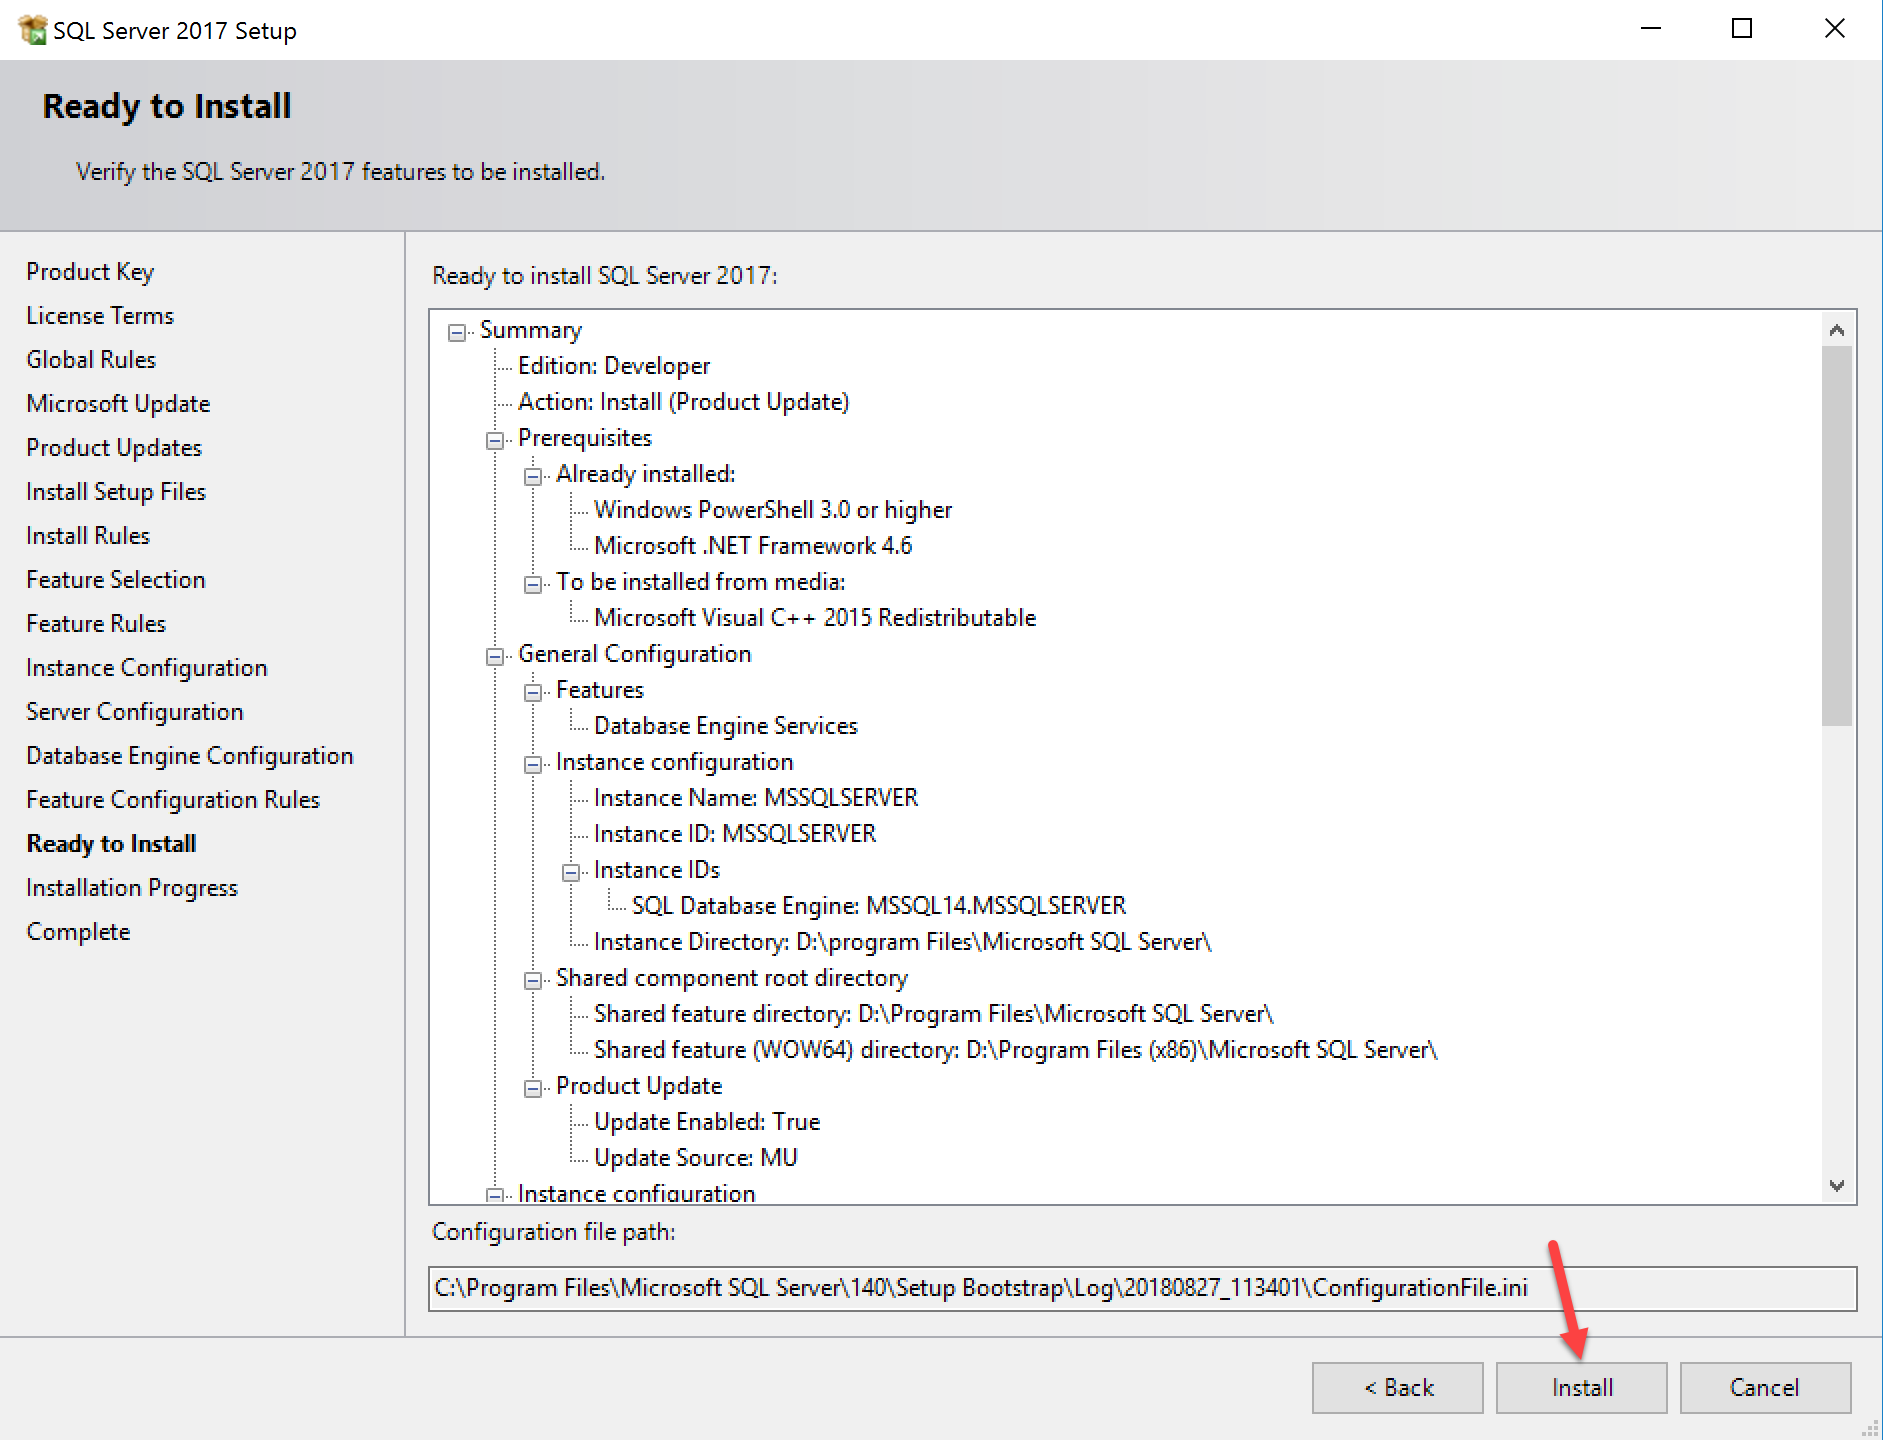
Review your configuration, then click Install:
Ready to install
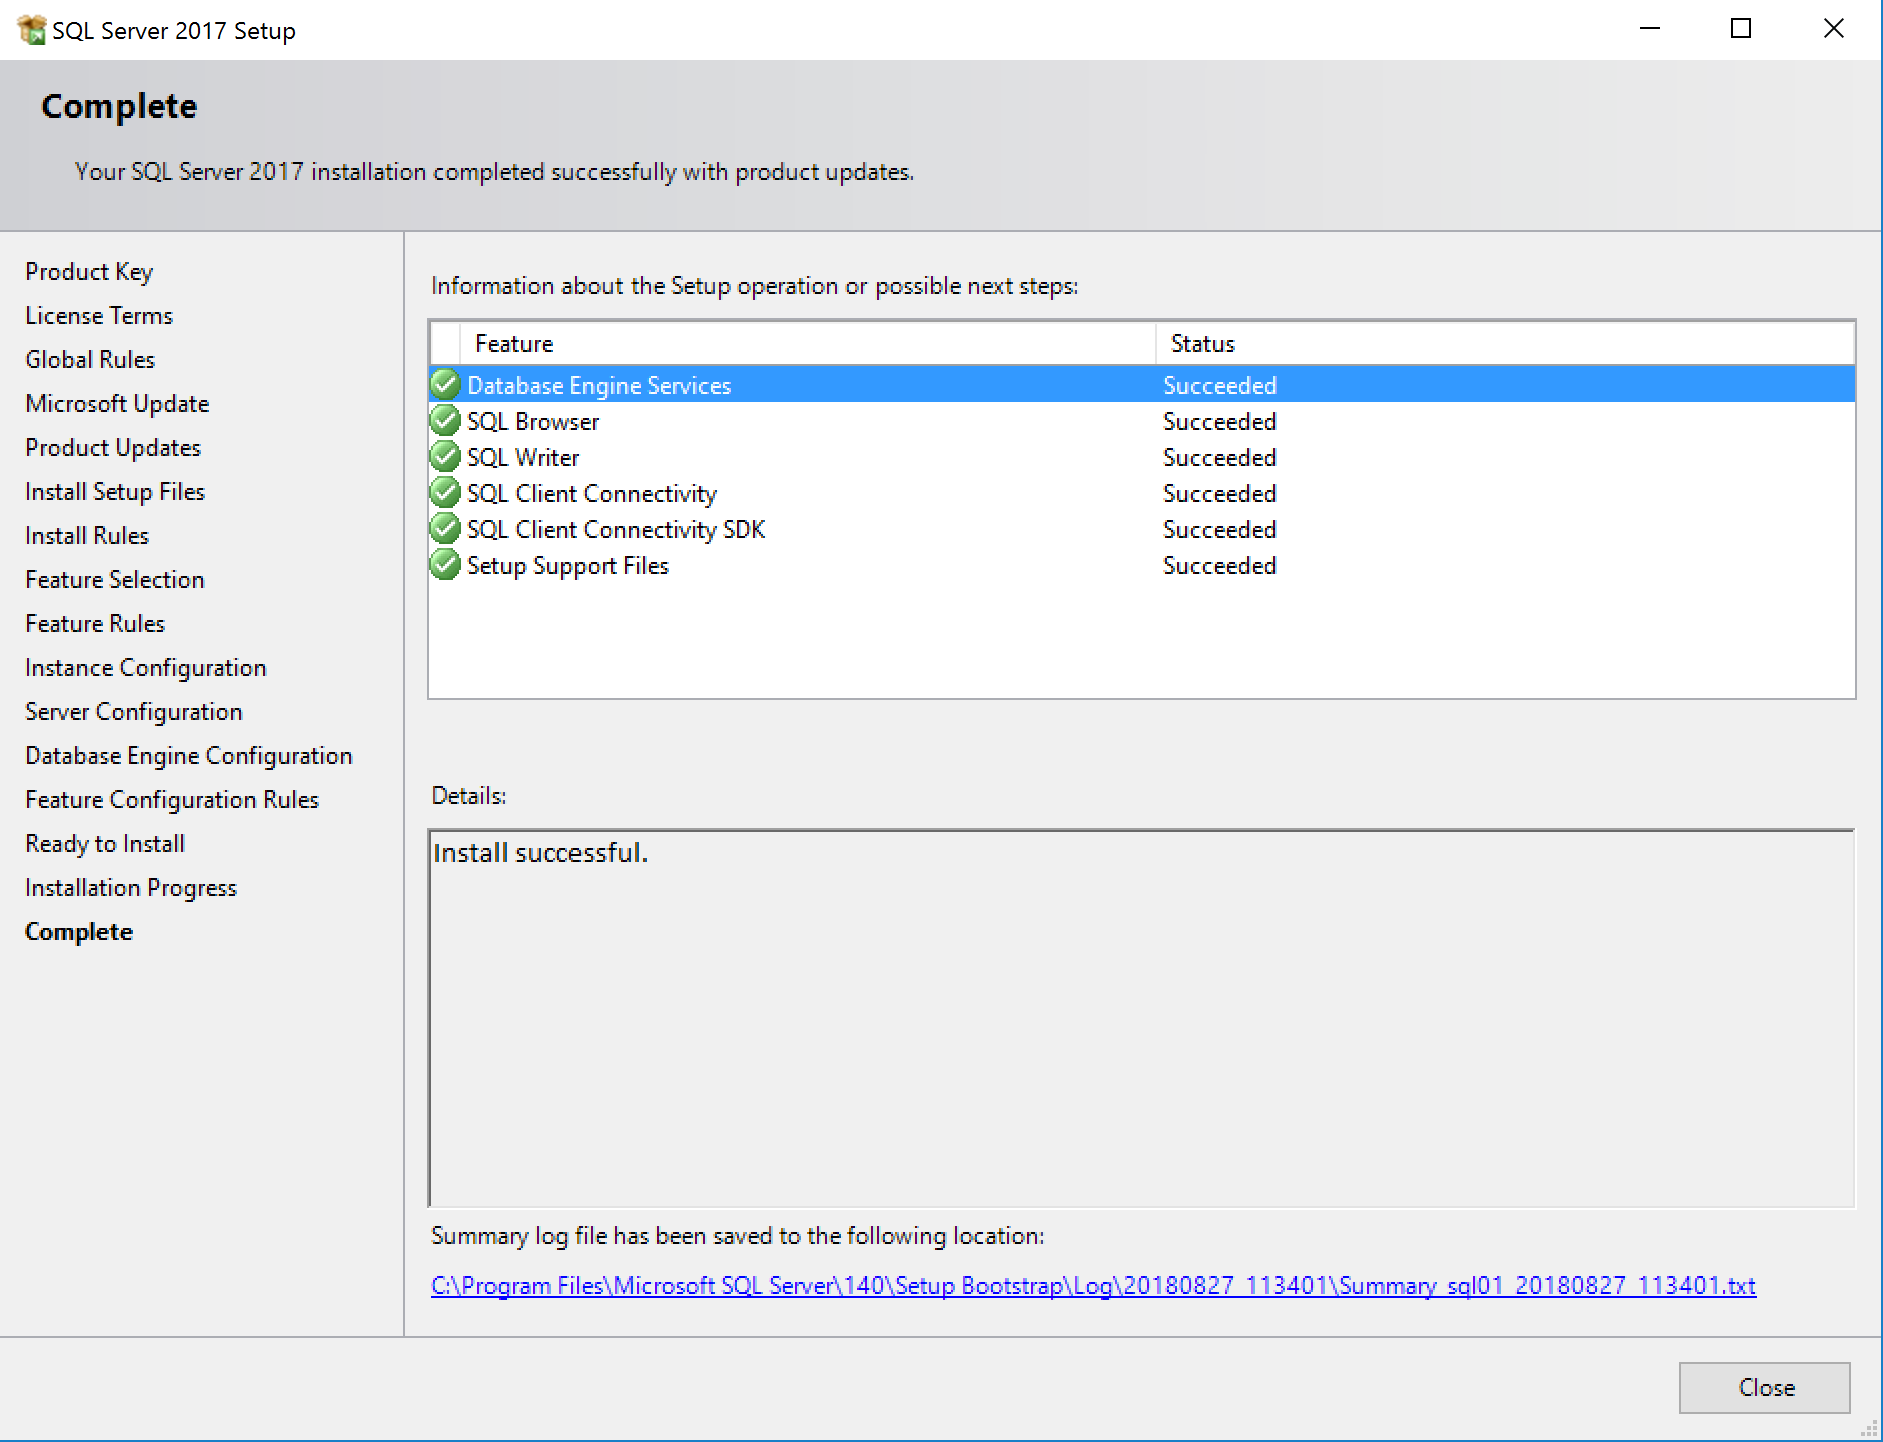
Hopefully, your installation will complete successfully:
Complete
SQL Server 2017, Developer edition is now successfully installed on my test machine. This completes the first part of this series. In the next article, I’ll be addressing general best practices that must be configured on a production machine.